Credit Notes

[et_pb_section fb_built="1" _builder_version="3.22"][et_pb_row _builder_version="3.25" background_size="initial" background_position="top_left" background_repeat="repeat"][et_pb_column type="4_4" _builder_version="3.25" custom_padding="|||" custom_padding__hover="|||"][et_pb_text _builder_version="4.6.5" background_size="initial" background_position="top_left" background_repeat="repeat"]
All credits information is available in this module.
Sometimes a reduction in the invoice price is necessary and sometimes the stock which has been ordered and invoiced may be returned, in which case a credit would be issued.
[caption width="1024" id="attachment_1413" align="alignnone"]

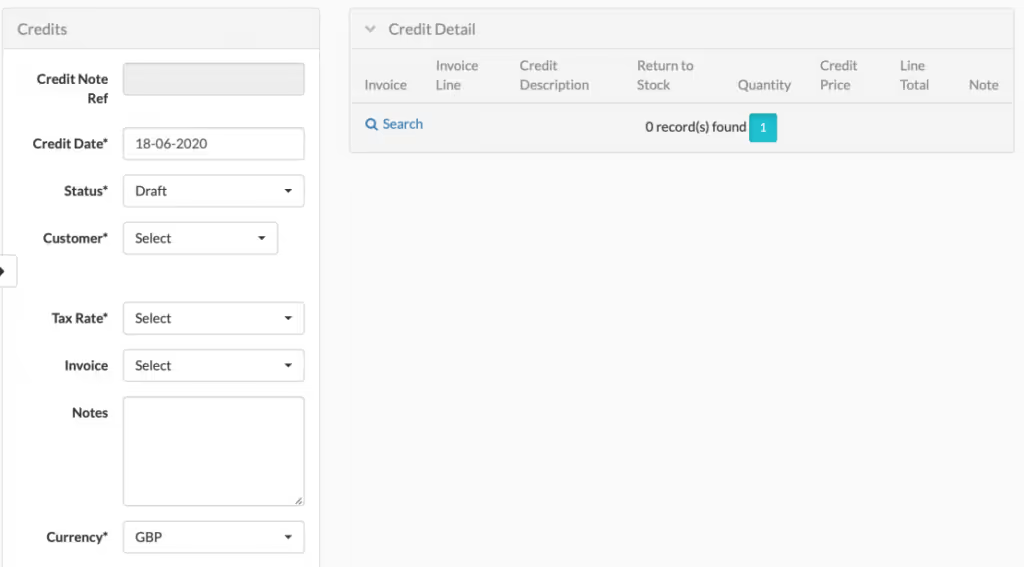
Fig 81 Credits Display[/caption]
New credits can be created by clicking the Add New button in the top right-hand corner of the screen.
[caption width="1024" id="attachment_1414" align="alignnone"]

Fig 82 Credit Add[/caption]
Input the relevant credit information and click Save.
This table contains details of what all the Credits fields represent.
Credits Name of FieldMandatoryDescriptionCredit Note RefDefaultsSystem generated reference which defaults on saveCredit DateDefaultsDefaults to today’s date but can be changedStatusDefaultsDefaults to draft and can be changed after you have saved the credit note. Possible values are: Draft, Sent, Complete and Cancelled. At status “Sent” the Credit Note will be passed too Xero.CustomerYSelect from Dropdown of all customersTax RateYSelect from Dropdown of all tax ratesInvoiceNSelect from Dropdown of all customer invoices,NotesNNotes that you wish to be easily visible.CurrencyYThe currency for the credit note.Credit NetDefaultsThe amount of the creditCredit TaxDefaultsThe tax being reimbursedCredit TotalDefaultsThe sum of Credit Net and Credit TaxXero Credit NoteDefaultsXero Credit Note ReferenceXero RefDefaultsXero Reference
Once you’ve entered the basic details of the Credit you need to enter the line details.
On the right-hand side of the screen you can see Credit Details, here you enter the products the credit relates to.
[caption width="940" id="attachment_1415" align="alignnone"]

Fig 83 Credit Detail View[/caption]
Click the Credit details line to expand the section. Click + New to create a new credit line.
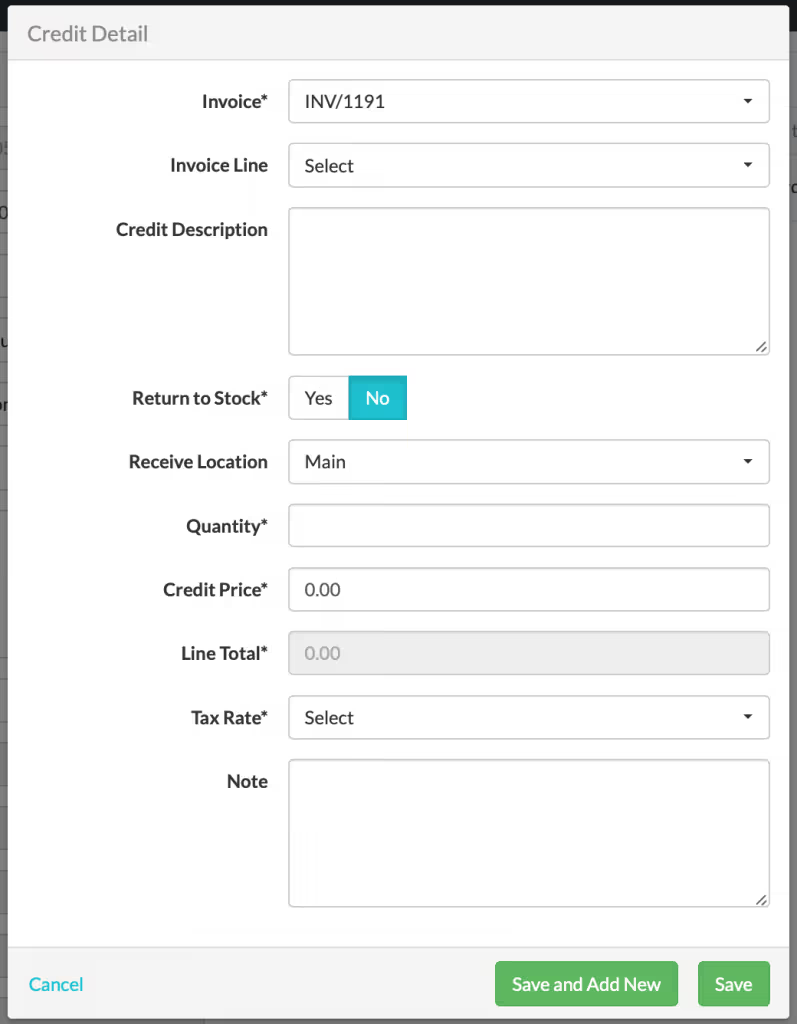
[caption width="797" id="attachment_1416" align="alignnone"]

Fig 84 Credit Detail[/caption]
Enter the credit details and Save.
This table contains details of what all the Credits fields represent.
Credits Name of FieldMandatoryDescriptionInvoiceDefaultsDefaults to the invoice you entered in the main credits section.Invoice LineYSelect the invoice line that this refund is for. Note you can enter multiple lines by selecting “Save and Add New”Credit DescriptionNA description of the creditReturn to StockDefaultsIs the item being returned to stock? This defaults to No and can be changed to YesReceive LocationDefaultsThis defaults to main and can be changedQuantityNThe number of items to be creditedCredit PriceDefaultsThis defaults to Price of item defined in Order Line but it can be changed if you are not crediting the full amount.Line TotalDefaultsThis defaults to Quantity x Credit PriceTax RateDefaultsThis normally defaults to the tax rate on the item for which the credit is being made. However if you are making a non specific refund (i.e. not linked to a particular line of the order) then you will need to select the tax rate from the dropdown.NoteNAny notes about this credit[/et_pb_text][/et_pb_column][/et_pb_row][/et_pb_section]
Ready to Transform
Your Customer Management?
Get started today and see the difference Workhorse can make for your business.


.svg)

