User Set Up

[et_pb_section fb_built="1" _builder_version="3.22"][et_pb_row _builder_version="3.25" background_size="initial" background_position="top_left" background_repeat="repeat"][et_pb_column type="4_4" _builder_version="3.25" custom_padding="|||" custom_padding__hover="|||"][et_pb_text _builder_version="4.6.5" background_size="initial" background_position="top_left" background_repeat="repeat" hover_enabled="0" sticky_enabled="0"]
From the settings module, you can choose ‘Users’. In this section, you can add, edit, view and disable users. You can also manage what modules the users have access to.
When you access the user section you will see a list of all the users that have been set up.
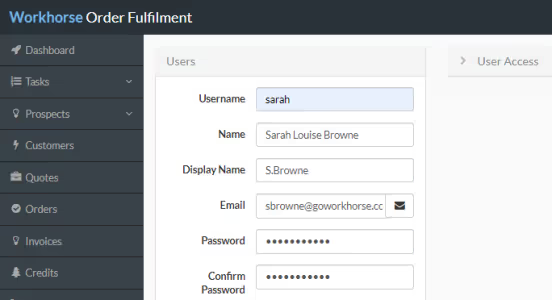
To create a new user, click the Add New button in the top right-hand corner of the screen.
[caption width="306" id="attachment_1174" align="alignnone"]
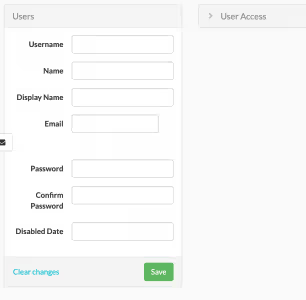
Fill in all the relevant fields and Save the record.[/caption]
This table describes what all the fields represent.
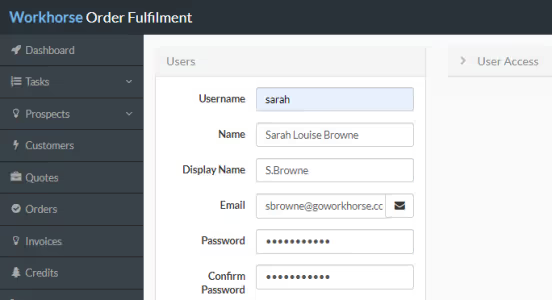
Field NameField DescriptionUsernameMandatory. This is the name that is entered on the login page together with the password.NameMandatory. Actual name of the user
DisplayDisplay NameMandatory. Name which can be seen within the systemEmailMandatory. The new users email addressPasswordMandatory. User Password, if a user forgets their password they can be re-set here by the Super User or they can request a reset on the login page. The super user would normally be the first user that has been set up. There can be more than one. The Super User is the user that has access to the Settings and normally, Full Access on all the modules. More details of access rights to modules to follow.
Passwords must be at least 8 characters, a mix of numbers and letters, upper case and lower case with at least one special character like “!”.Confirm PasswordMandatory. Must be the same as the passwordDisabled DateOptional. When, for example, an employee leaves the company, you would enter a disabled date so the user will not be able to access the system any more. NB it’s not possible to delete a user from the system.
In the top right-hand side of the screen, you can see User Access. Click anywhere on the box to expand it. This is where you define which modules a user has access to. Click the + New Button on the right-hand side of the User Access section.
Note: You must ensure the user record is saved before you can create New User Access. This is the same for all other modules that have sections within them.
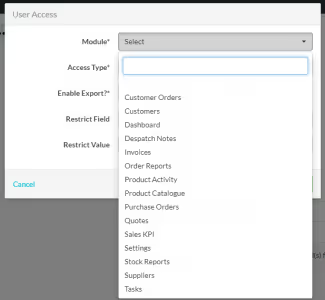
Now select the first module you would like to give them access to from the drop-down.
Then, what access type they should have for that module.
There are four types of access:
● Full – Can view, create, edit and delete
● Edit and Add New – Can view, create and edit
● Edit – Can view and edit
● View – View only
● None – No rights
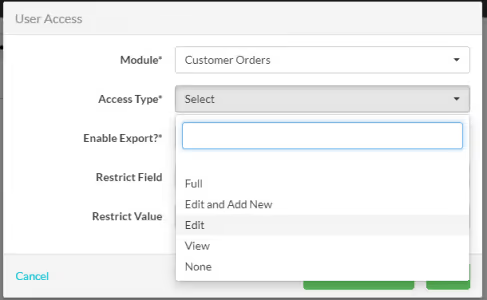
Note: We strongly recommend giving users no higher than Edit and Create New. Deleting records can be dangerous so if necessary, the Super User could delete. The Super User could have Full rights if you feel there is an occasional need to delete records. They would also have access to the Settings module, so they can add users, re-set passwords and edit list, see the following section for further details on Lists.
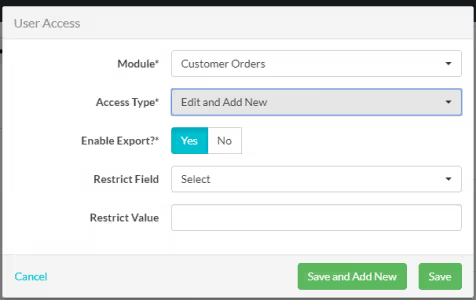
If you set the Enable Export to Yes, you will give the user the ability to download data to CSV for that module.
Once this is set you will see a download button in the module, in the top right hand corner next to the Add New Button.

The restricted field are used if you would like to restrict the user to only see certain records om the page, most of the time these fields will remain blank.
Now Save or Save and Add New if you would like to give the user access to other modules as well.
To view information for a user who has already been set up, click anywhere on the user information line in the User Table view which lists all the users. The User Detail screen will open.
[/et_pb_text][/et_pb_column][/et_pb_row][/et_pb_section]
Ready to Transform
Your Customer Management?
Get started today and see the difference Workhorse can make for your business.


.svg)
