

Kits
Kits are groups of Products that you sell together and do not require assembling before despatch (such as food hampers or self-assembly furniture kits). Use the Kits page to manage your Kit Catalogue.
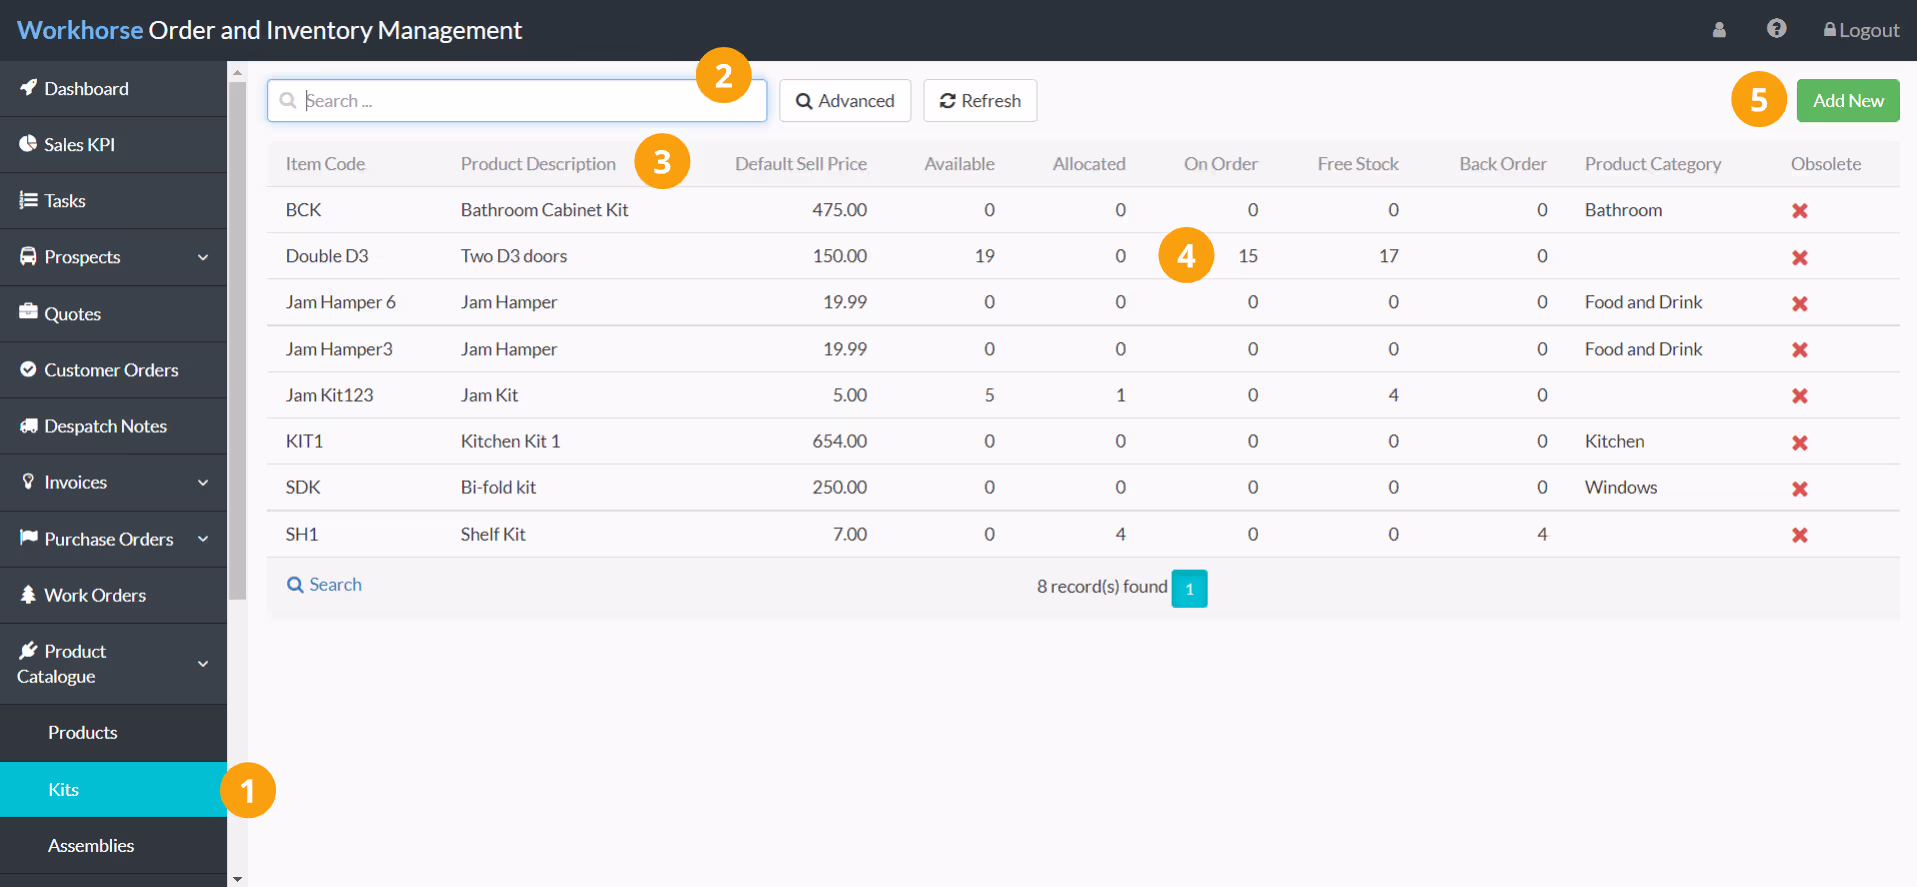
- Navigate to Product Catalogue > Kits.
- Use the Quick and Advanced Search to help you find the Kit you’re looking for.
- By default, Kits are ordered by Item Code (numerically, then A-Z). To sort by something else, click on the column heading. Click again to reverse the sort order.
- The Available, Allocated, On Order, Free Stock, and Back Order columns help you to keep track of your Inventory at a glance. Refer to Kit field explanations for more information on each field. A Kit will show as Available when all of the component products are In Stock at a single location.
- Click Add New to add a new Kit to your Kit Catalogue.
Note:
The Kits page is customisable so you can see the information that is most important to you and your workflow.
Add a new Kit
Note:
To create a new Kit, you will need to have appropriate User Access to the Product Catalogue Module.
1. Go to Product Catalogue > Kits.
2. Click Add New in the top-right corner.

Tip:
You can also create a copy of an existing Kit by opening the Kit, scrolling to the bottom of the page and selecting Functions > Copy Kit. This creates a new Kit where you can edit the details as necessary.
3. A new Kit entry page will be displayed. Start by selecting/entering the details as required in the Kits section.
Note:
You will need to complete all of the mandatory fields (marked with a *) before you can save the Kit.
Refer to Kit field explanations for more information on each field.
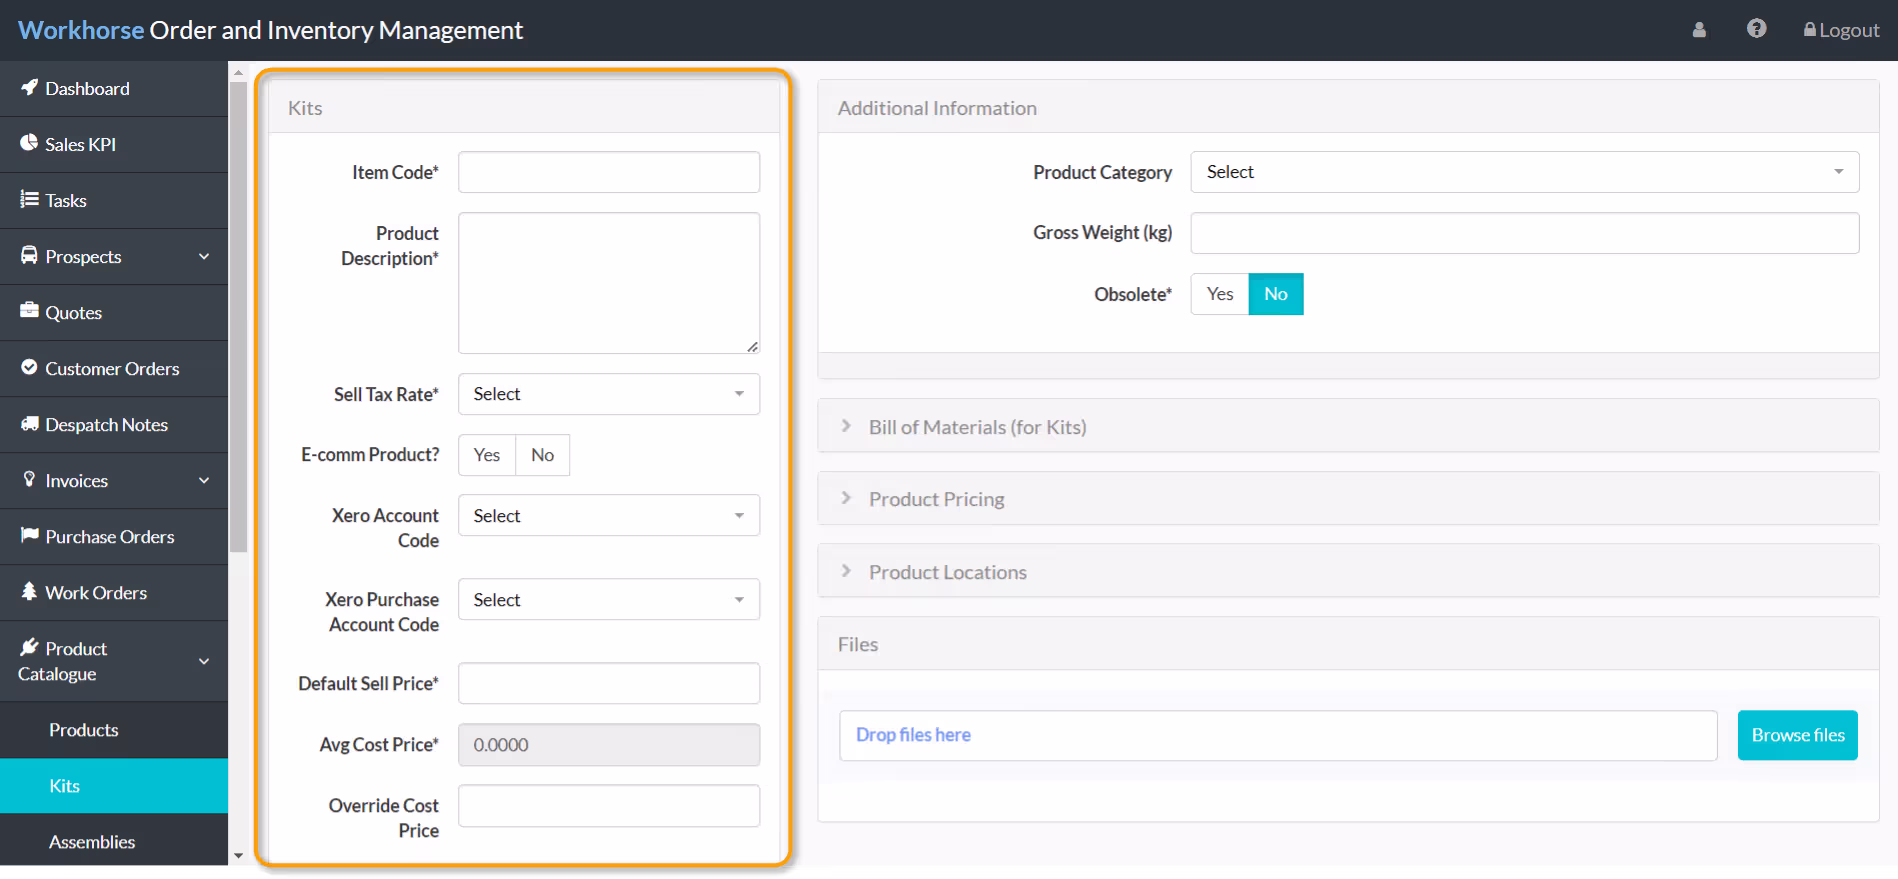
4. Once all of the required details have been selected/entered in the Kits section, scroll down and click Save before adding any other information on the right-hand side.

Add Component Products to a Kit
Note:
Component Products must first be added in Products before they can be added to a Kit.
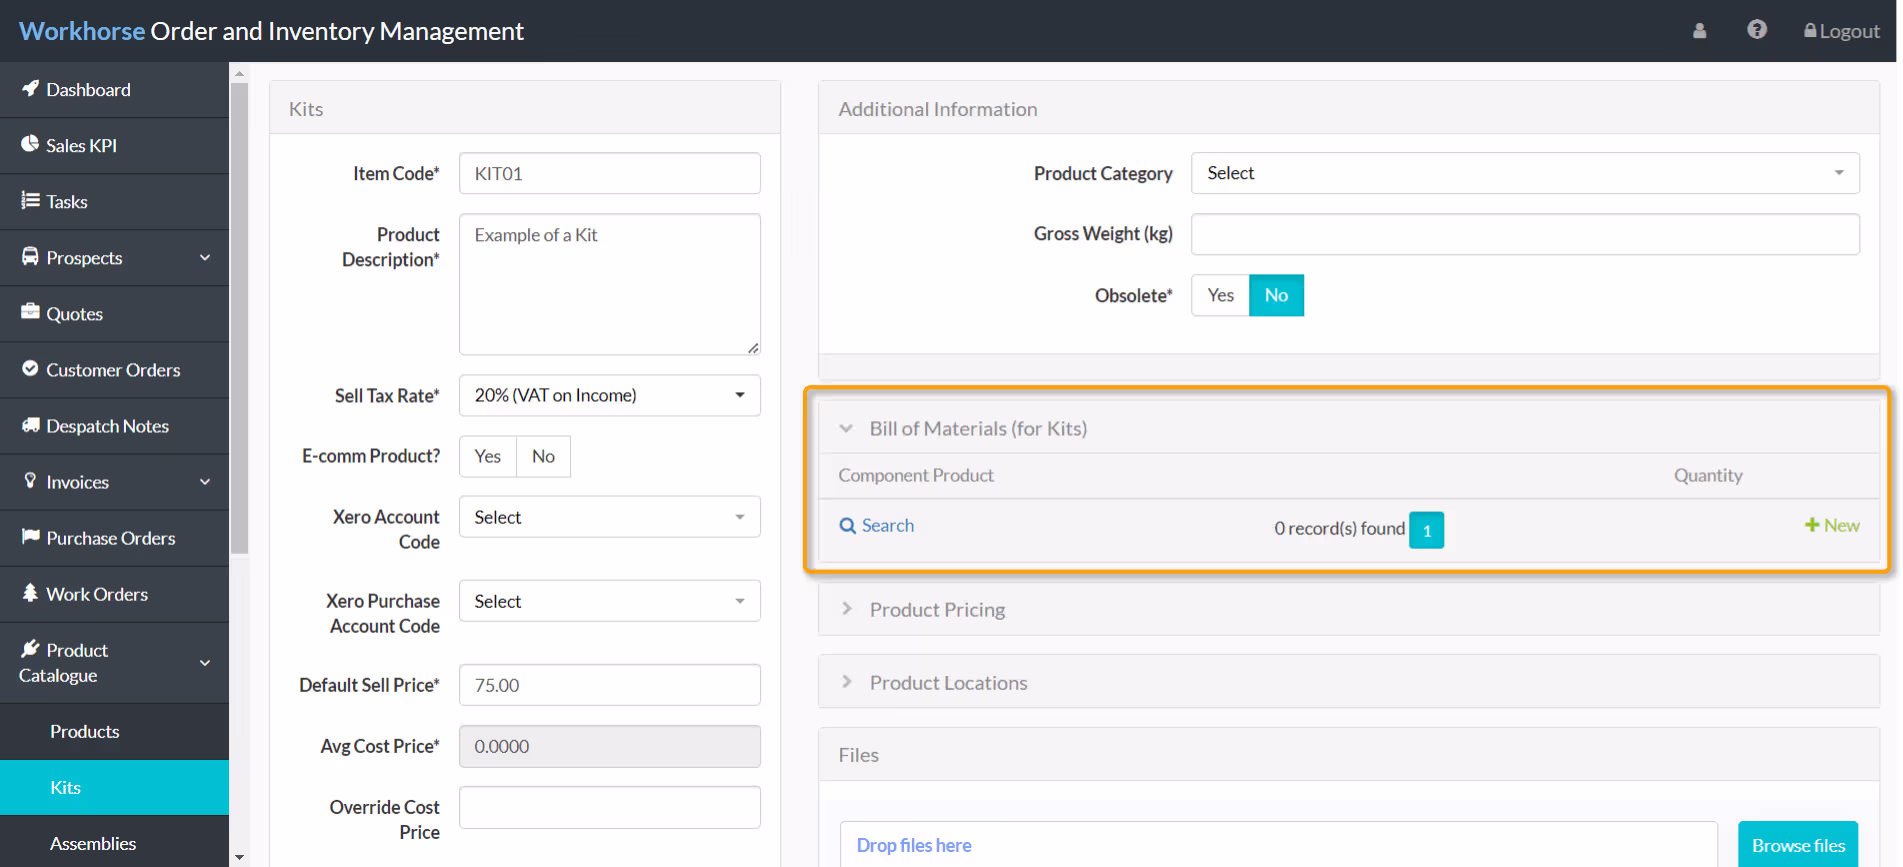
1. Expand the Bill of Materials (for Kits) section and click + New.
2. The Bill of Materials (for Kits) form will be displayed. Select/enter the details as required:
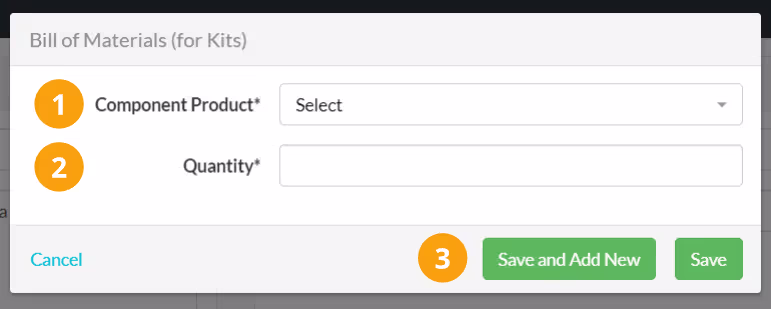
- Select a Component Product from the drop-down list.
- Enter the Quantity of the selected Product included in each Kit.
- Click Save or Save and Add New to add another Component Product to this Kit.
Add other information to a Kit
Use the other sections of the Kit entry page to do the following:
- Assign the Kit to a Product Category or add other information under Additional Information.
- Configure quantity-based pricing under Product Pricing.
- Record where the Kits are stored under Product Locations.
- Upload Files associated with the Kit under Files.