All customer information is available in this module.
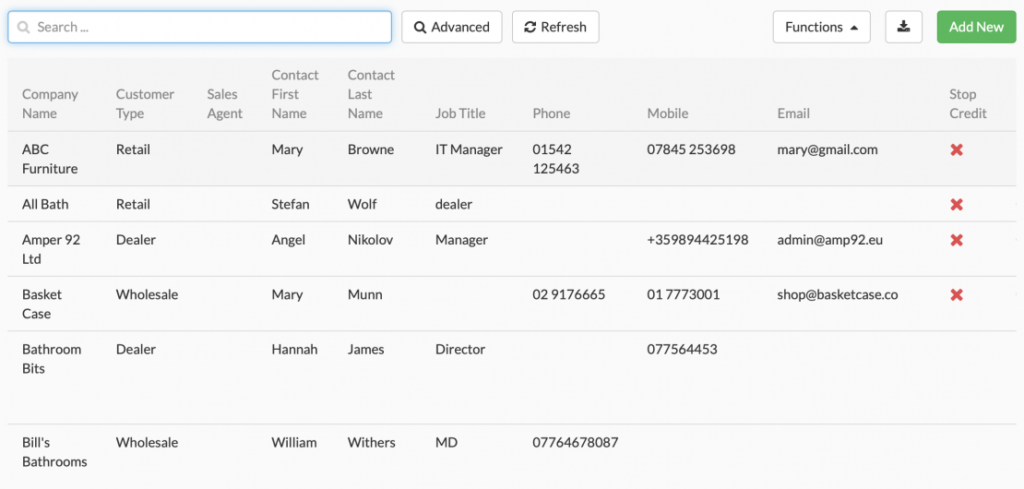
Fig 51 Customer Display
New customers can be created by clicking the Add New button in the top right-hand corner of the screen.
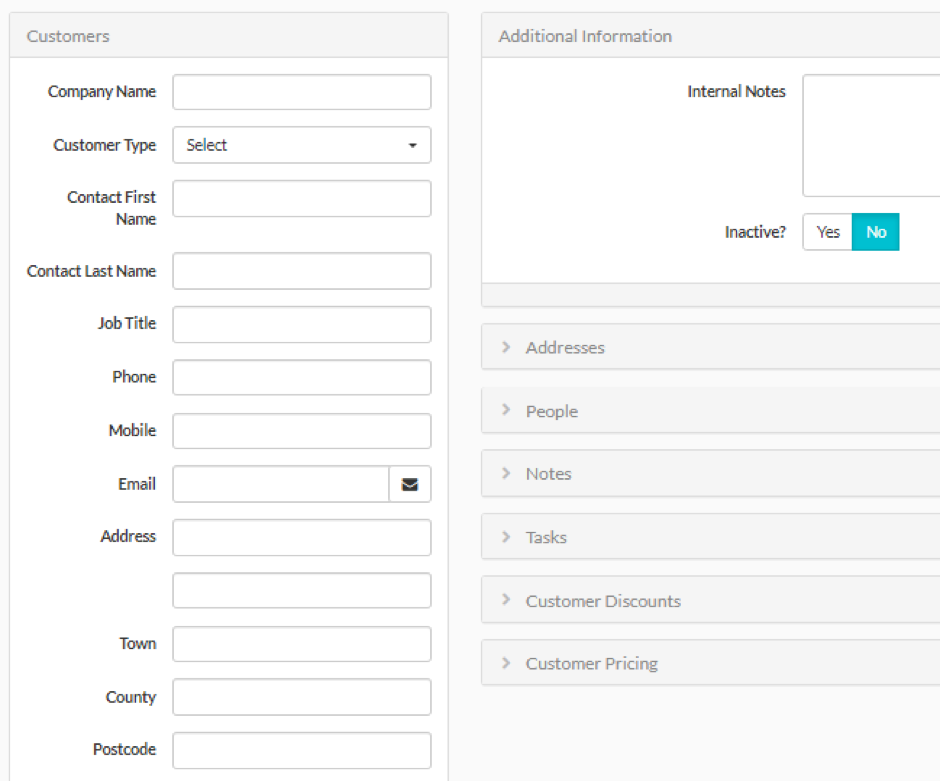
Fig 52 Customer Input
Input the relevant Customer information and click Save.
This table contains details of what all the Customer details represent.
| Customers | ||
| Name of Field | Mandatory | Description |
| Company Name | Y | The name of the company. |
| Customer Type | Y | The type of company. Dropdown drawn from the Customer Types you have configured in the Lists tab of settings |
| Contact First Name | N | The first name of your primary contact at the company. |
| Contact Last Name | N | The surname of your primary contact at the company. |
| Job Title | N | The job title of the contact. |
| Phone | N | Landline phone number. |
| Mobile | N | Mobile phone number. |
| N | Email address. | |
| Address | N | First line of address. |
| Town | N | Town |
| County | N | County |
| Postcode | N | Postcode |
| Country | N | Country – you can enter the first letters of the country to find it more easily. |
| Customer Discount | N | A percentage discount which will apply to all quotes and orders. Number between 1 and 100. |
| Stop Credit | N | |
| Credit Limit | N | If a credit limit is set, the system will check the Account Balance against the Credit Limit and if the Account Balance has exceeded it it will not be possible to place an order. |
| Account Balance | N | Total of Unpaid Quotes and Orders, this field is auto populated by the system. |
| Price List | N | If you have set up price Lists in the Product Catalogue module, you can select them here and the product prices charged to this client will be taken from the selected price list (where a price exists on the list for a product). |
| Default Currency | N | If a price list is selected, the currency will mirror the price list currency and cannot be edited. If no Price List is set you can enter the relevant currency for this customer. |
| Default Tax Rate | Y | The tax rate for this customer. This tax rate will be defaulted into this customer’s quotes and orders but can be changed if necessary. |
| Tax Number | N | Customer Tax Number can be entered here |
| Payment Terms | Y | In Micro these are 7 Days, 14 Days and 1 Month and they set the Invoice Due Date based on the Invoice Date. In Pro they can be set to any value. |
| Default Despatch Location | N | This field outlines the main stock location that the stock will be taken from to despatch to your clients. You can create new Locations in Settings > Stock Locations. This field will default to Main and you can change it if necessary. Useful if you supply certain geographical areas from certain depots. |
| Xero Reference | N | Disabled field which will auto populate if your system integrates with Xero |
On the right-hand side of the screen you can see Additional Information, Addresses, People, Notes and Tasks, Customer Discounts and Customer Pricing. Within these sections, multiple addresses, contacts (people), notes, tasks, customer discounts and customer pricing for the client can be entered, viewed and edited.
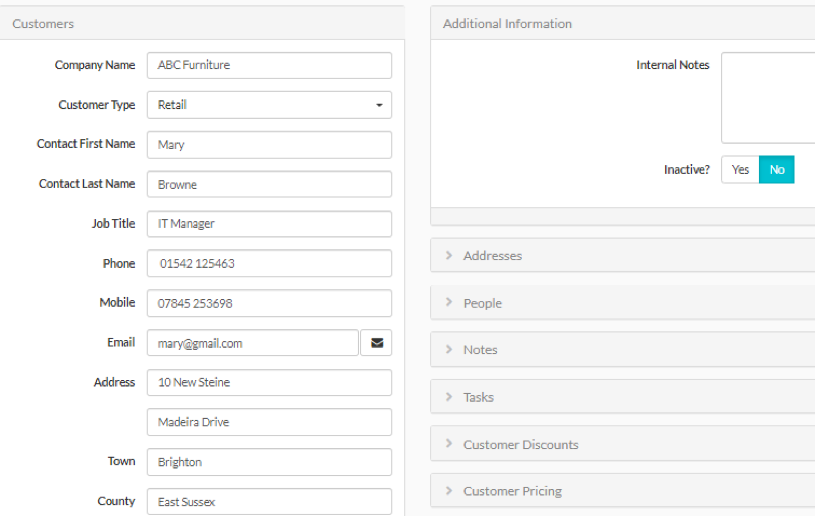
Fig 53 Customer Detail
To view Customer Addresses, Contacts, Notes, Tasks, Customer Discounts and Customer Pricing, click anywhere on the section you want to open and that section will expand. If entries have already been made, these will display.
When you enter a clients’ record, the Additional Information fields will be displaying and it is possible to enter Internal Notes about the client here. This field is generally used for generic information about the customer. It is also possible to set a customer to inactive.
| Additional Information | ||
| Name of Field | Description | Type |
| Internal notes | Freeform field in which you can enter notes about the customer. | Optional |
| Inactive? | This will default to No but if a customer is Inactive you can set the Flag to Yes. | Optional |
Addresses
Your customer may be operating from a number of addresses and it’s possible that orders might be sent to different addresses. This is where you enter alternative addresses. The address field elsewhere (quotes and orders) will default to the address set up in the main customer pane. If you want to use addresses set up in this pane you will have to select the correct address from the Addresses dropdown in Quotes and Orders.
Click the Addresses line to expand the section. Click + New to create a new Address.
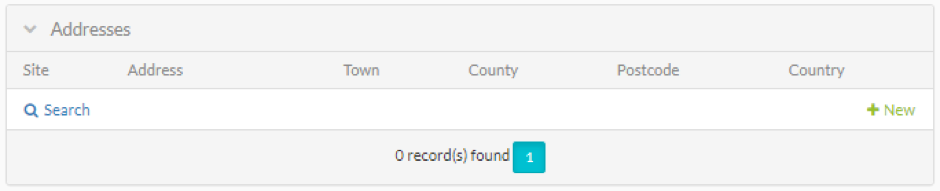
Fig 54 Customer Addresses
Enter the Address details and Save.
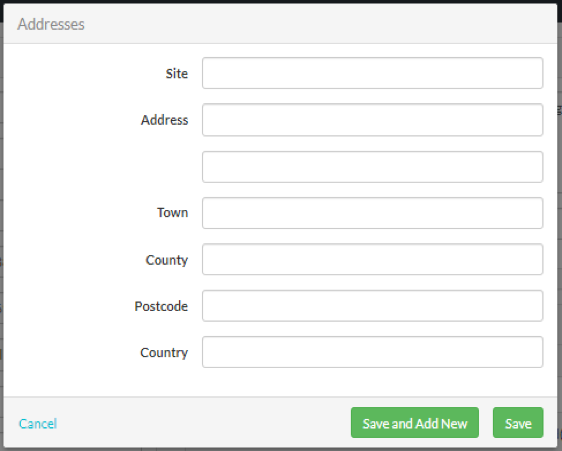
Fig 55 Customer Addresses Detail
Note: When creating a quote or an order, you will be able to select these addresses from the drop-down. If no additional addresses are set up here, or you don’t select one from the drop-down in the Quotes or Orders module, all the printable documents like Quote or Order Confirmation will default to the client’s main addresses.
All client information can be viewed or edited by opening a client record while in Customer table view (which is the view which opens when you first access the Customer module). Click the line of the client you would like to view. This screen which displays contains all the information on the client, the client table view only contains a subset of this information.
See below a list of all the fields contained in the Customer Subsections.
| Addresses | ||
| Name of Field | Mandatory | Description |
| Site | Y | The site name |
| Address | First line of address | |
| Town | N | Town |
| County | N | County |
| Postcode | N | Postcode |
| Country | N | Country – you can enter the first letters of the country to find it more easily. Dropdown field |
People
Use this section to enter the details of any other personal that you might contact at the Customer company. For example your contact in accounts.
| People | ||
| Name of Field | Mandatory | Description |
| First Name | Y | First name. |
| Last Name | Y | Surname. |
| Phone | N | Landline phone number. |
| Mobile | N | Mobile. |
| N | Email address. | |
| Mail button | N | Button. Opens your mail system. |
Notes
General notes about the customer should be stored in the Additional Information field since these will be seen whenever you open a Customer record. This notes section will display all notes which have been added for this customer including all notes that have been added to quotes and orders for this customer and the section can be used to add specific notes (e.g. notes about a conversation with the customer).
| Notes | ||
| Name of Field | Mandatory | Description |
| Date | Y | Date of creation of note. |
| Note | Y | Text of note. |
| Customer | Y | Defaults to the name of the Customer whose record you are in. Cannot be changed here. |
| Quote/Order | N | If the note pertains to a particular order you can link the order here. Dropdown shows all orders for this customer. |
| Created By | Y | The person who created the note. Defaults to the Display Name of the user creating the Note. This field is auto populated and cannot be changed in the Micro version of Workhorse. |
Tasks
Tasks can be added from the Customers areas of Workhorse. See Tasks section for full description of functionality. When they are added from the Customer area, the customer name will populate automatically and the Order Number dropdown will only show orders for this customer.
Customer Discounts
Customer Discounts enables you to set a percentage discount at either the Product Category level or the Product level. See the FAQ on Prices and Discounts for full details of how this works.
| Customer Discounts | ||
| Name of Field | Mandatory | Description |
| Category | Y | The Product Category to which you wish to apply the discount. |
| Product | Y | The product to which you wish to apply the discount. |
| Discount | Y | The percentage discount you wish to apply. |
Customer Pricing
Customer Pricing enables you to set a special price for a product for a customer. See FAQ on Prices and Discounts (section 20.1) for full information on how this works.
| Customer Pricing | ||
| Name of Field | Mandatory | Description |
| Product | Y | The product. Dropdown of all Products |
| Price | Y | The price you wish to set for this product for this customer. Number. |
- Tasks
All Task information is available in this module.
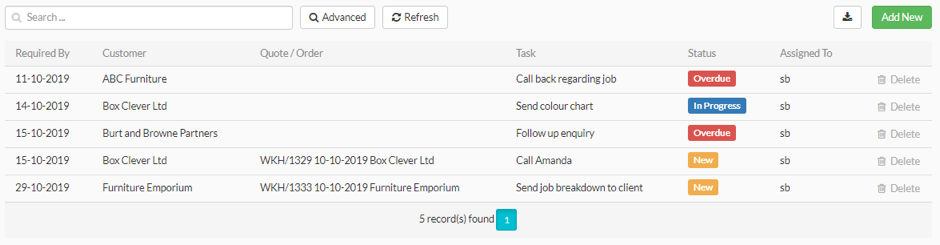
Fig 56 Tasks table view
It shows you all active tasks i.e. any tasks that haven’t been completed yet. In the Micro version of Workhorse this will just show tasks assigned to you. In the Pro Version, all active tasks for all users will show here.
New Tasks can be created by clicking the Add New button in the top right-hand corner of the screen.
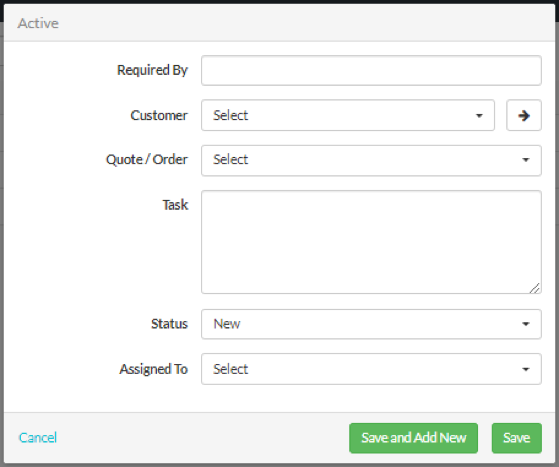
Fig 57 Task Detail
Input the relevant Task information and click Save. More information on Tasks can be found at this link.
NB Tasks can also be added in the Quotes, Customer Orders and Customers modules of Workhorse. The functionality is largely the same as when you add a task in the Tasks section however certain fields will automatically populate when you add Tasks in particular Modules. This is detailed in each module.
To view Completed tasks, select Advanced Search and select Status Complete, then all the Complete tasks will display.