Invoices
Use the Invoices Module to invoice Customers for their Customer Orders. You can add a new Invoice from a Customer Order or add a new (blank) Invoice. You can also track the status of existing Invoices or print or email an Invoice and send it to the Customer.
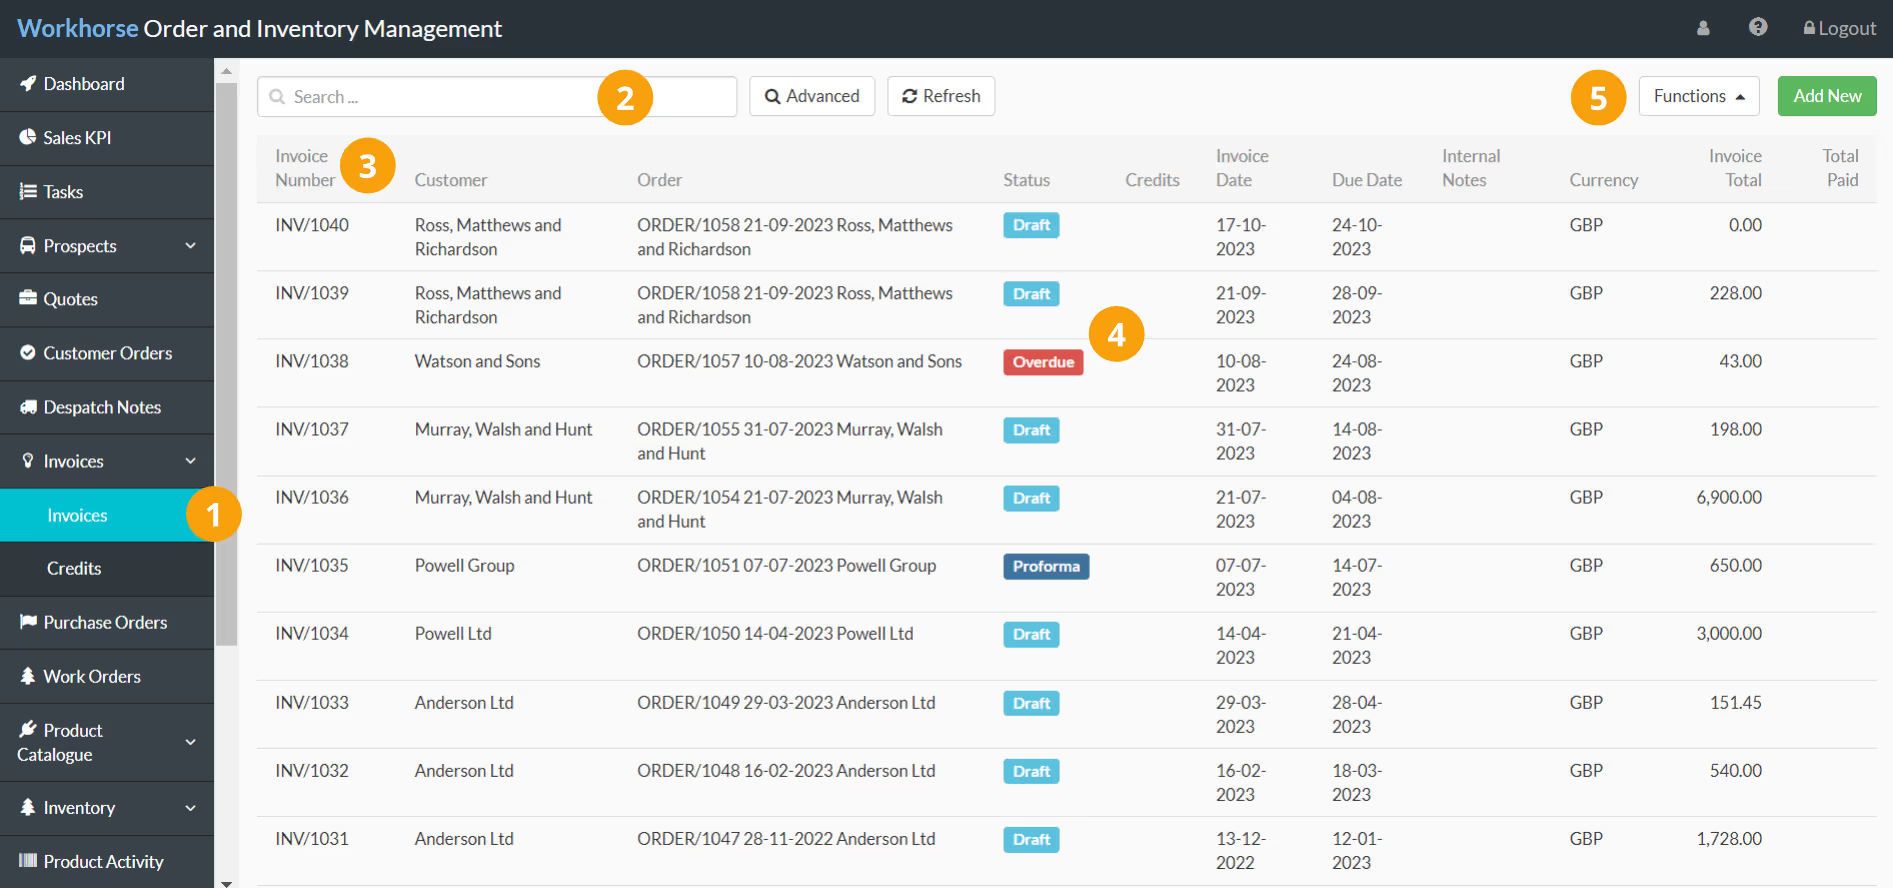
- Navigate to Invoices > Invoices.
- Use the Quick and Advanced Search to help you find the Invoice you’re looking for.
- By default, the most recent Invoices are displayed at the top of the page. To sort by something else, click on the column heading. Click again to reverse the sort order.
- The Status column helps you to keep track of each Invoice at a glance.
- Click Add New to add a new (blank) Invoice. Under Functions, you’ll see an option to Generate Invoices for Despatched Orders. Use this button to bulk generate Invoices for all Customer Orders that have been despatched. If you have a Xero integration, you’ll also see an option to Sync Xero Open Invoices, ensuring your Invoice list is up to date across Workhorse and Xero.
Note:
The Invoices Module is customisable so you can see the information that is most important to you and your workflow.
Add a new Invoice from a Customer Order
Note:
Invoices can be created from the Invoices Module, but you can also create an Invoice from the associated Customer Order and allow Workhorse to auto-fill the Invoice with all Order Line items.
To create a new Invoice from a Customer Order, you will need to have appropriate User Access to the Customer Orders and Invoices Modules.
1. Go to Customer Orders.
2. Open the Customer Order you want to create an Invoice for.
3. Click Invoices to expand the section and click + New.

4. A new Invoices entry page will be displayed, auto-filled with information from the Customer Order. Start by entering or selecting any missing details in the Invoices section.
Note:
You will need to complete all of the mandatory fields (marked with a *) before you can save the Invoice.
Refer to Invoice field explanations for more information on each field.
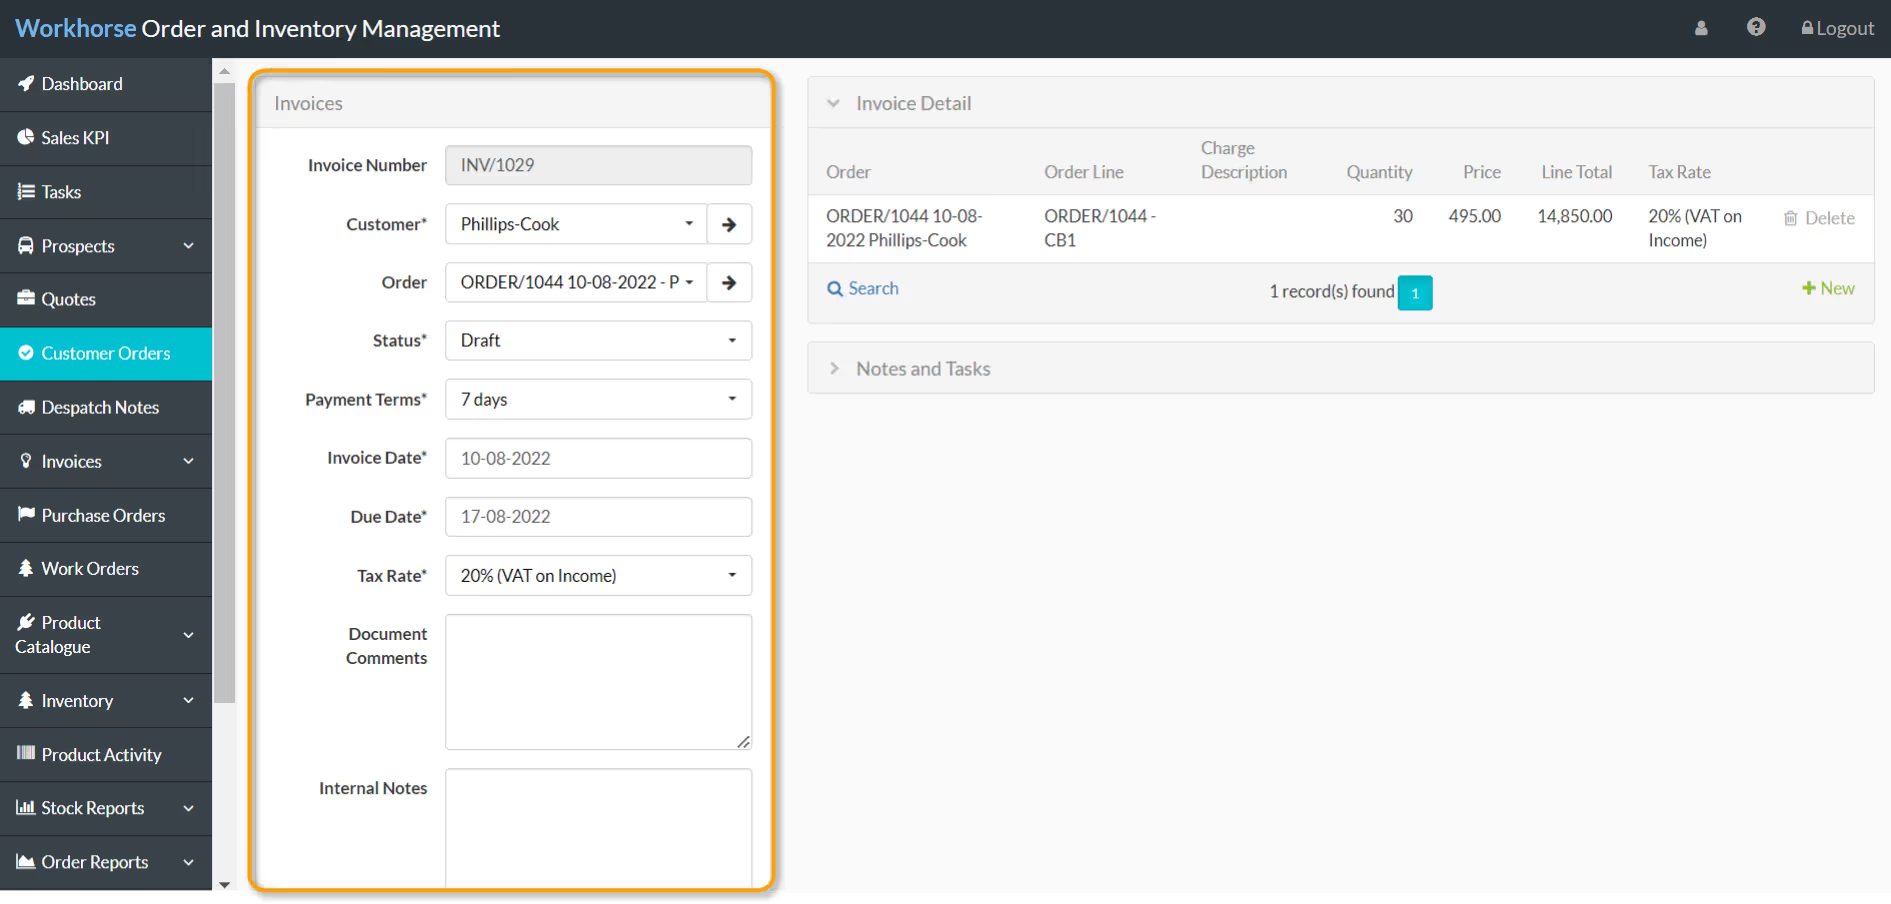
5. Once all of the required details under Invoices have been entered and selected, scroll down and click Save.

6. On the right-hand side, edit the Invoice Detail as required:
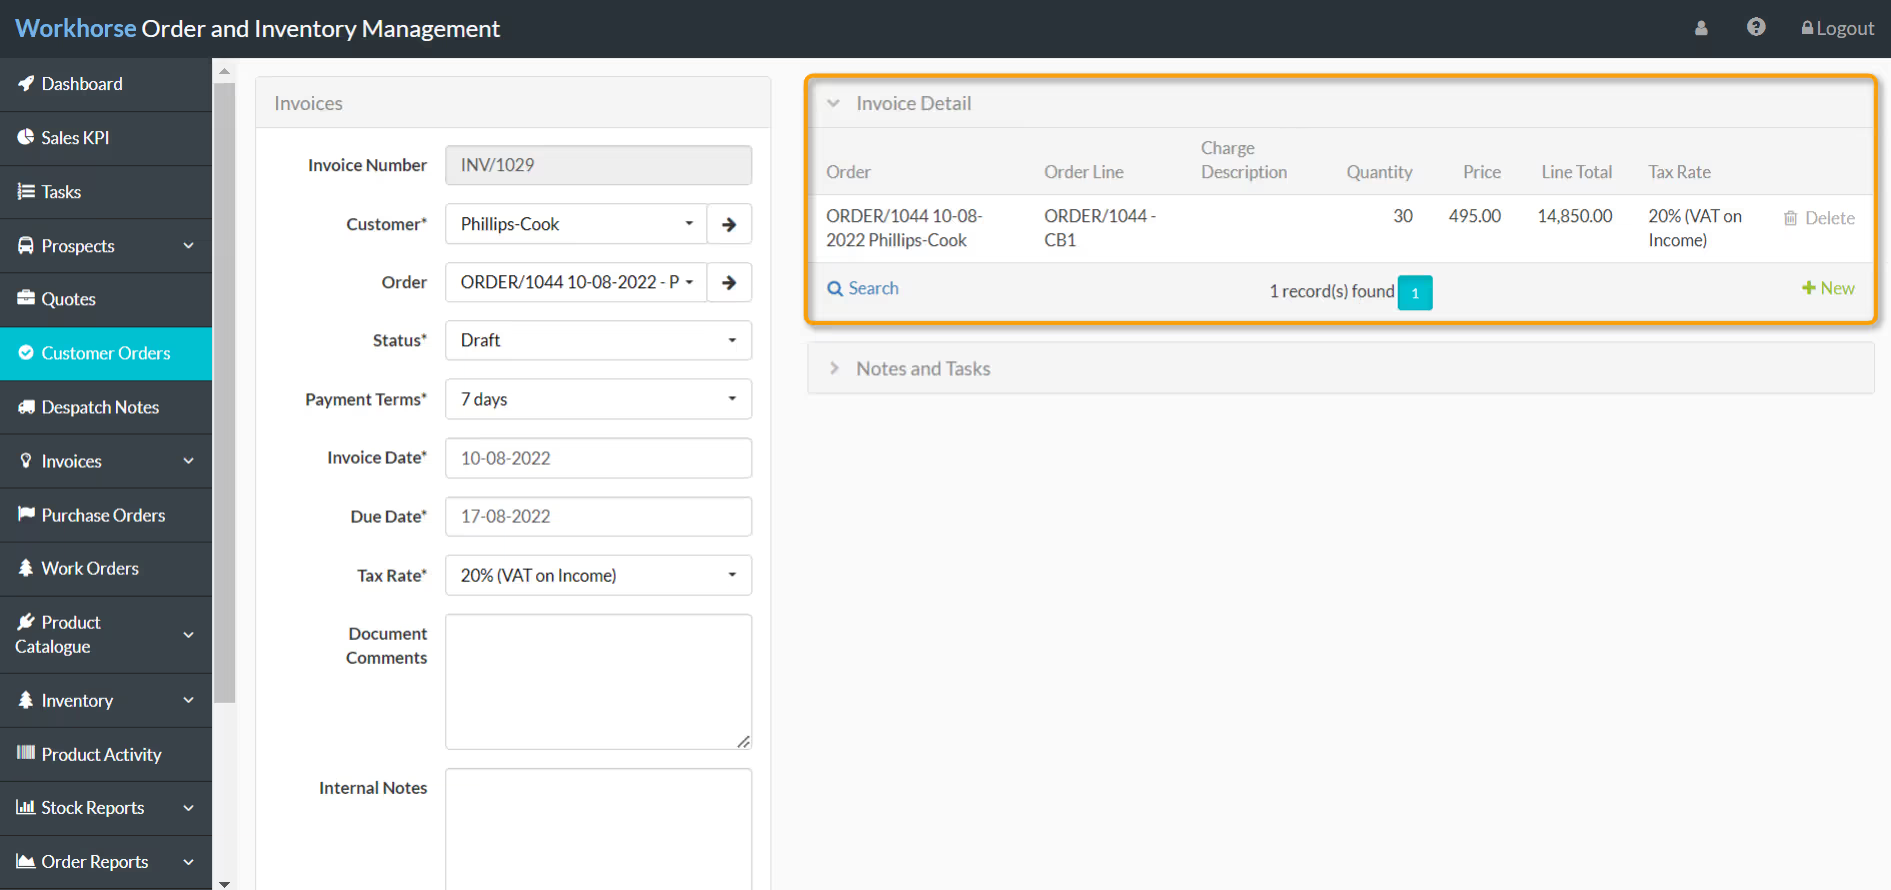
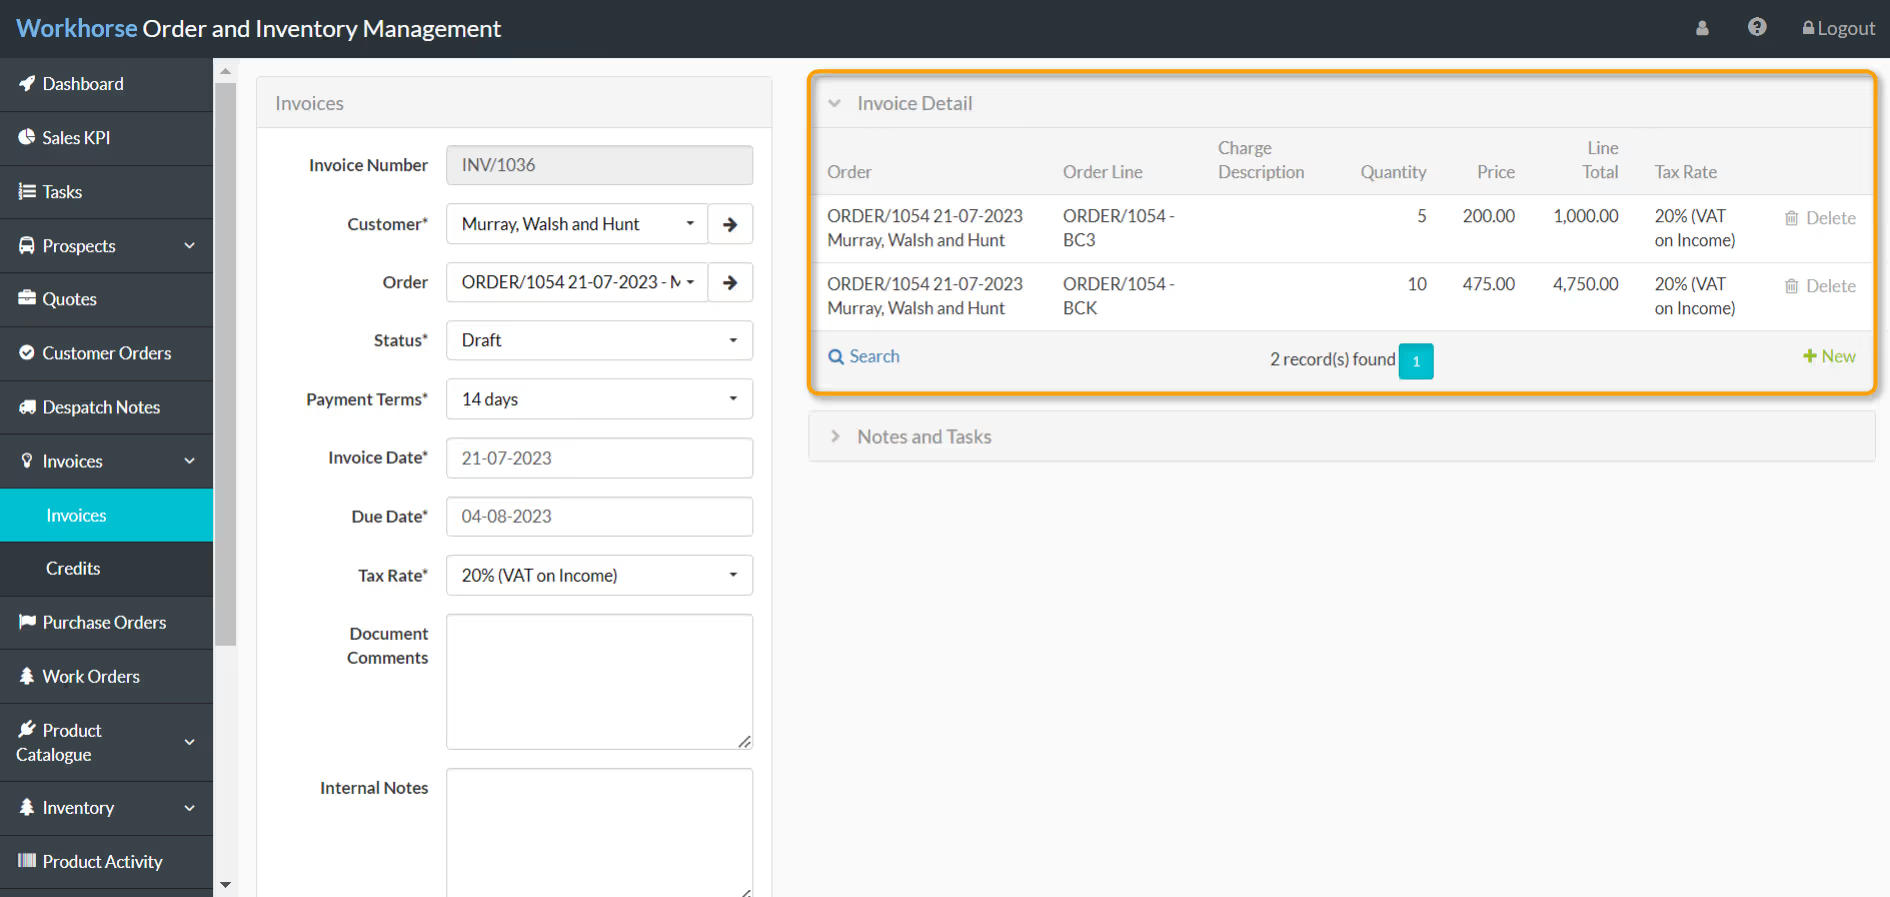
- Click on an Order Line to edit the Quantity being invoiced or to adjust the Price.
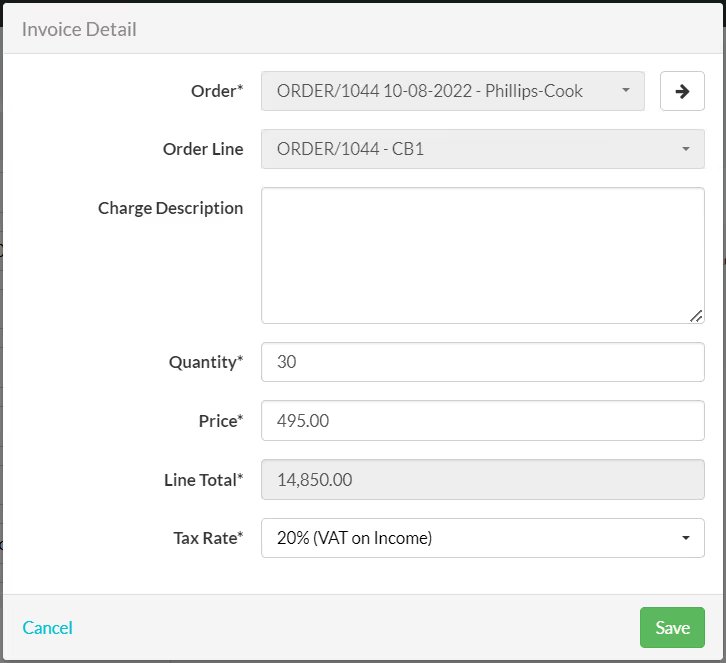
- To add other Lines (such as additional Charges) refer to Add Lines to an Invoice.
Add a new (blank) Invoice
1. Go to Invoices > Invoices.
2. Click Add New in the top-right corner.

3. A new draft Invoice will be displayed. Start by entering or selecting the details as required in the Invoices section.
Note:
You will need to complete all of the mandatory fields (marked with a *) before you can save the Invoice or add Order Lines to Invoice Detail.
Refer to Invoice field explanations for more information on each field.
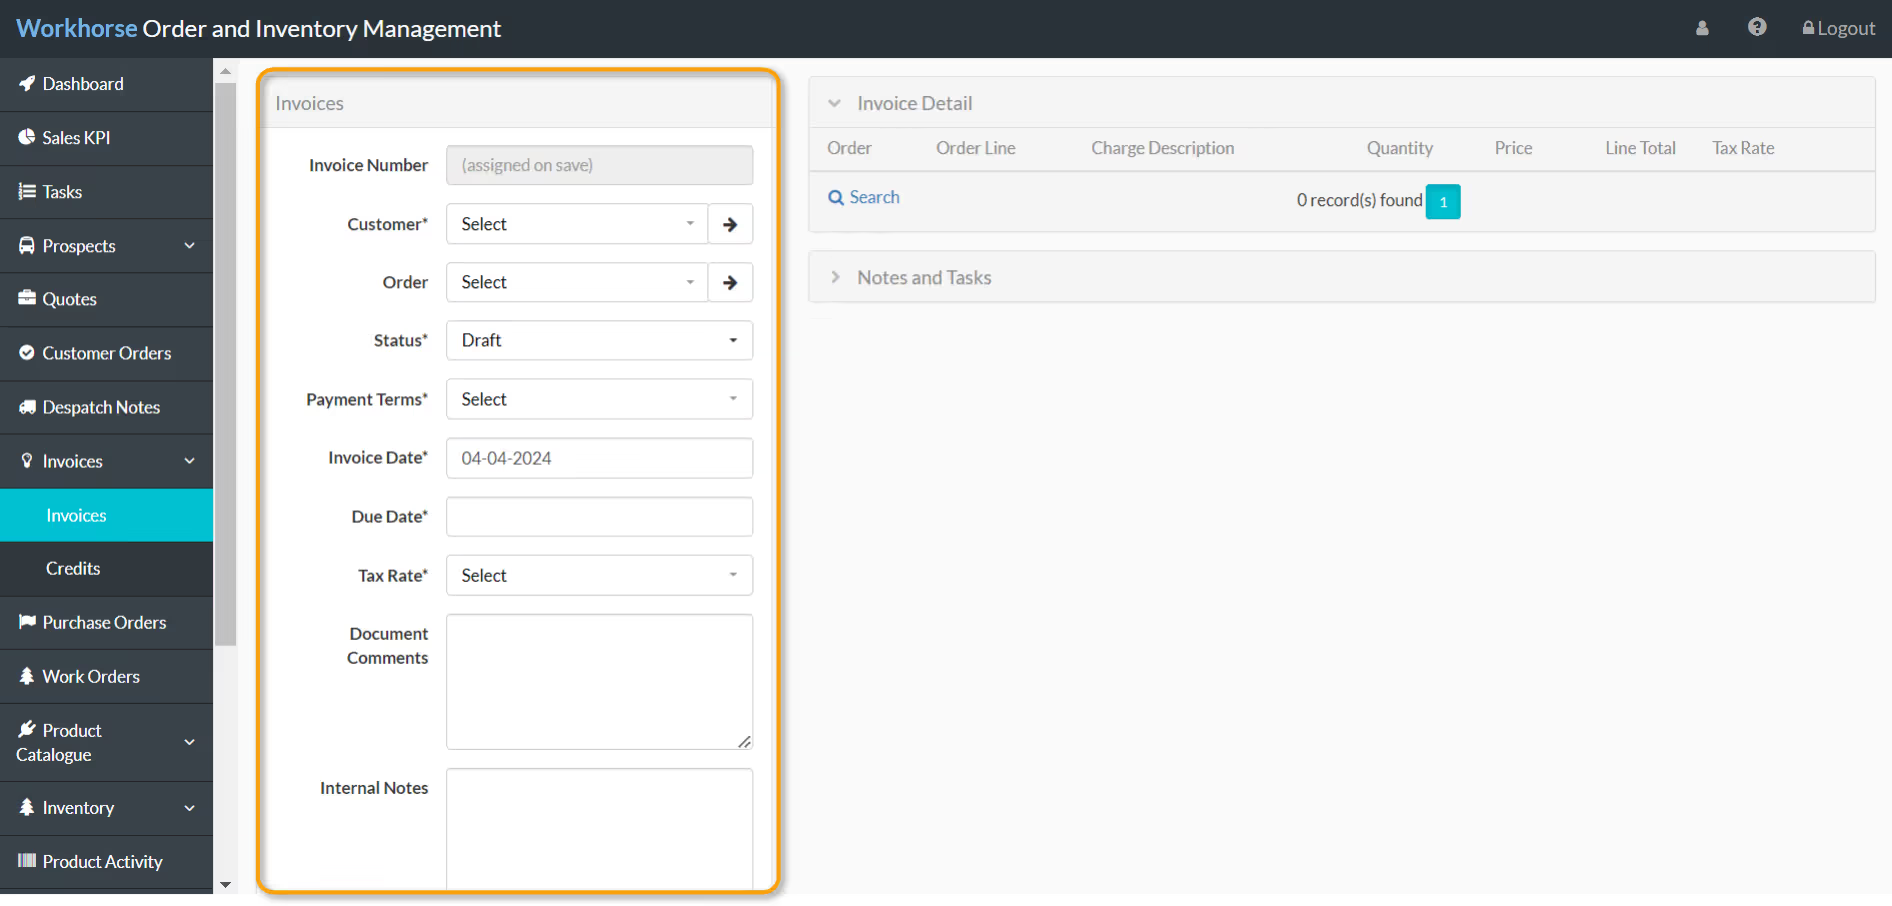
4. Once all of the required details under Invoices have been entered and selected, scroll down and click Save before adding Order Lines to Invoice Detail or Notes and Tasks.

5. To add Lines (such as Products from Customer Orders or additional Charges) to the Invoice, refer to Add Lines to an Invoice.
Add Lines to an Invoice
There are three ways to add Lines to an Invoice:
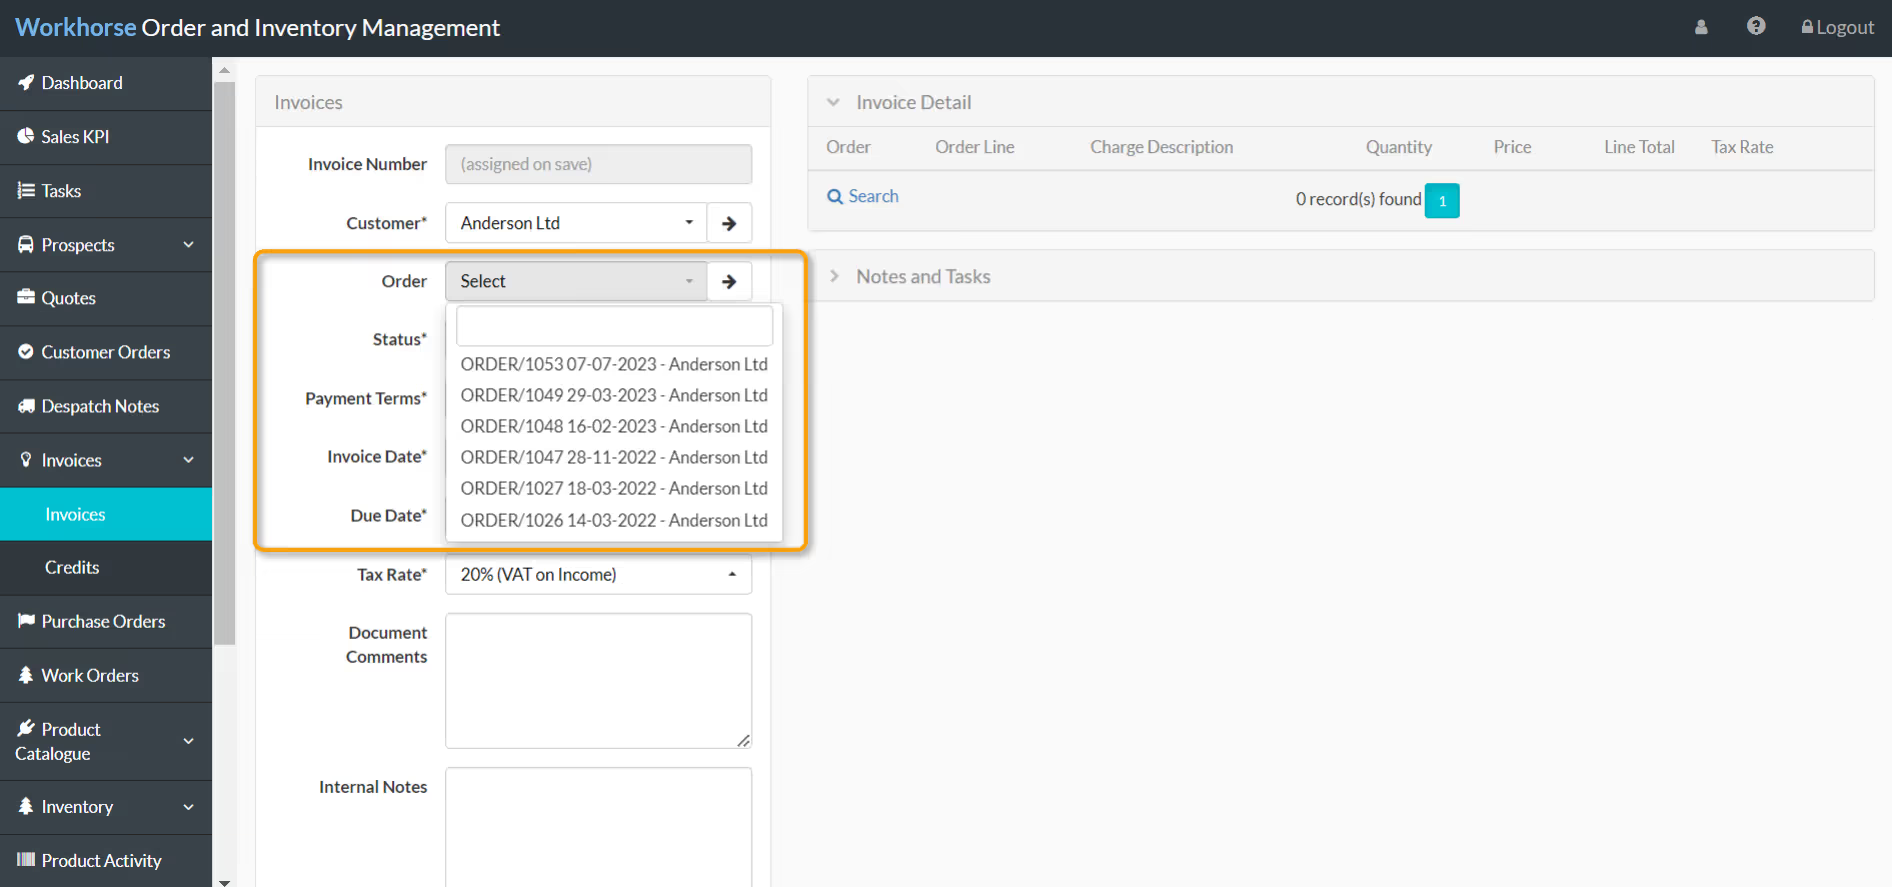
- To add all Lines not yet invoiced for a specific Customer Order, select the Customer Order from the Order drop-down list, after populating the Customer field. The Lines will be added under Invoice Detail once you click Save. By default, only despatched Lines are added to Invoice Detail.
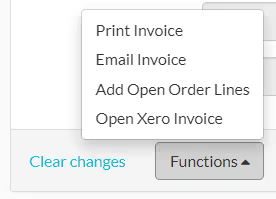
- To add all despatched Order Lines that have not yet been invoiced across all Customer Orders for the selected Customer, scroll down and select Functions > Add Open Order Lines. The Lines will be added under Invoice Detail.
- To add individual Order Lines (from the selected Customer Order or from other Customer Orders) or to enter an additional Charge, click + New under Invoice Detail.
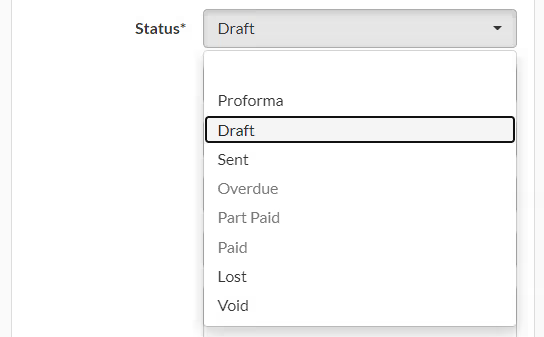
Update the status of an Invoice
The Status field helps to keep track of Invoice payments and can be viewed from the Invoices Module table view. Sometimes this field will need to be updated manually (such as when marking an Invoice as Sent). At other times this field will be updated automatically (such as when the Invoice is Overdue).
Print or email an Invoice
At the bottom of an Invoice, click the Functions button to Print or Email the Invoice.

Selecting Print Invoice will open a PDF of the Invoice which you can save or print.
Selecting Email Invoice will open the Send Email form. The Email Title, Email Body, and Reply To fields will be auto-populated based on your Invoices Email Template. The To field will be auto-populated with the Email saved on the Customer record. You can edit any of those fields or add files before clicking Send. This email will be sent directly from your Workhorse system.


.svg)