Assemblies
Assemblies are made up of several Component Products and assembled on site before despatch. Assemblies are added to stock by completing Work Orders. Use the Assemblies page to manage your Assembly Catalogue.

 |
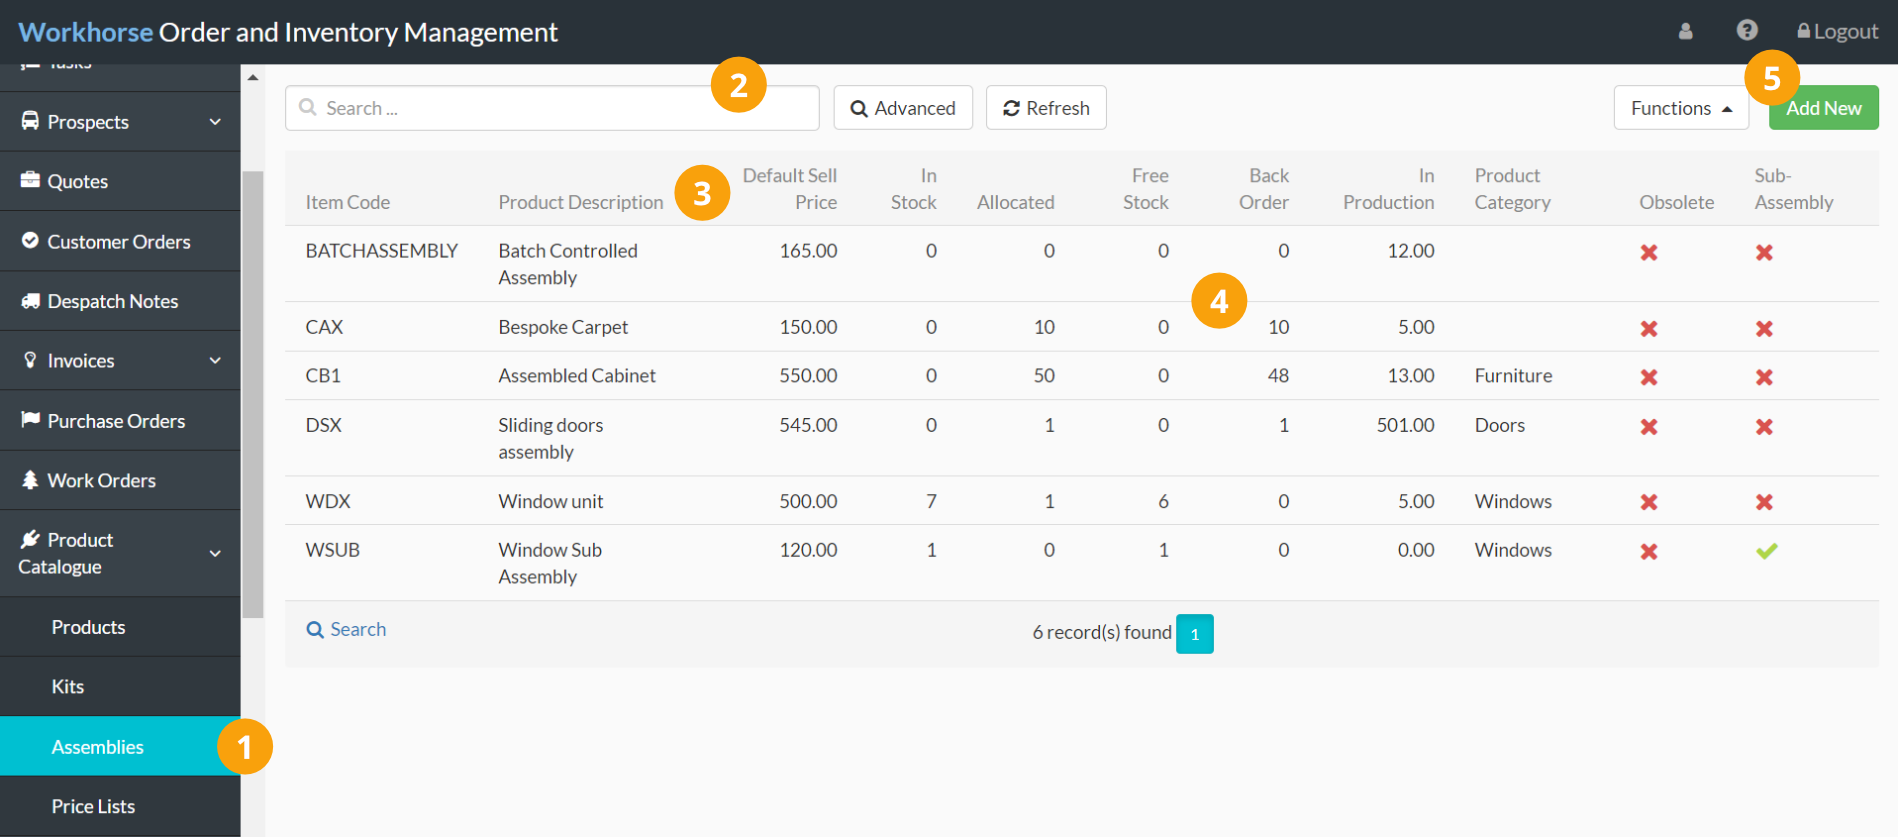
Navigate to Product Catalogue > Assemblies. |
 |
Use the Quick and Advanced Search to help you find the Assembly you are looking for. |
 |
By default, Assemblies are ordered by Item Code (numerically, then A-Z). To sort by something else, click on the column heading. Click again to reverse the sort order. |
 |
The In Stock, Allocated, Free Stock, Back Order and In Production columns help you to keep track of your Inventory at a glance. Refer to Assembly field explanations for more information on each field. In Production shows the quantity of Assemblies that are on open Work Orders. |
 |
Click Add New to add a new Assembly to your Assembly Catalogue. |
Note:
The Assembly page is customisable so you can see the information that is most important to you and your workflow.
Add a new Assembly
Note:
To create a new Assembly, you will need to have appropriate User Access to the Product Catalogue Module.
1. Go to Product Catalogue > Assemblies.
2. Click Add New in the top-right corner.

Tip:
You can also create a copy of an existing Assembly by opening the Assembly, scrolling to the bottom of the page and selecting Functions > Copy Assembly. This creates a new Assembly where you can edit the details as necessary.
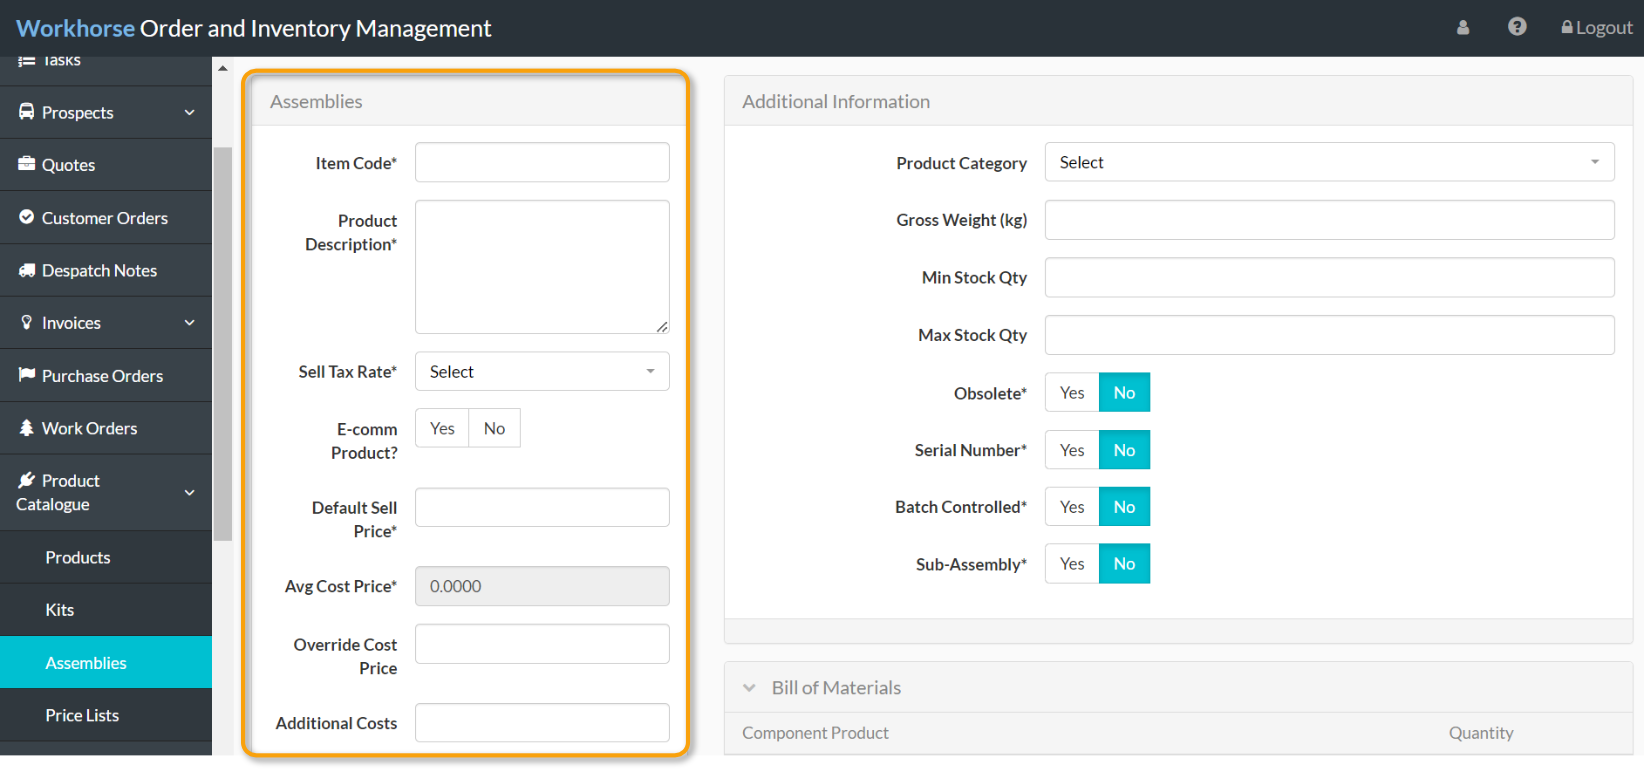
3. A new Assembly entry page will be displayed. Start by entering or selecting the details as required in the Assemblies section.
Note:
You will need to complete all of the mandatory fields (marked with a *) before you can save the Assembly.
Refer to Assembly field explanations for more information on each field.

4. Once all of the required details have been entered or selected in the Assemblies section, scroll down and click Save before adding any other information on the right-hand side.

Add Component Products to an Assembly
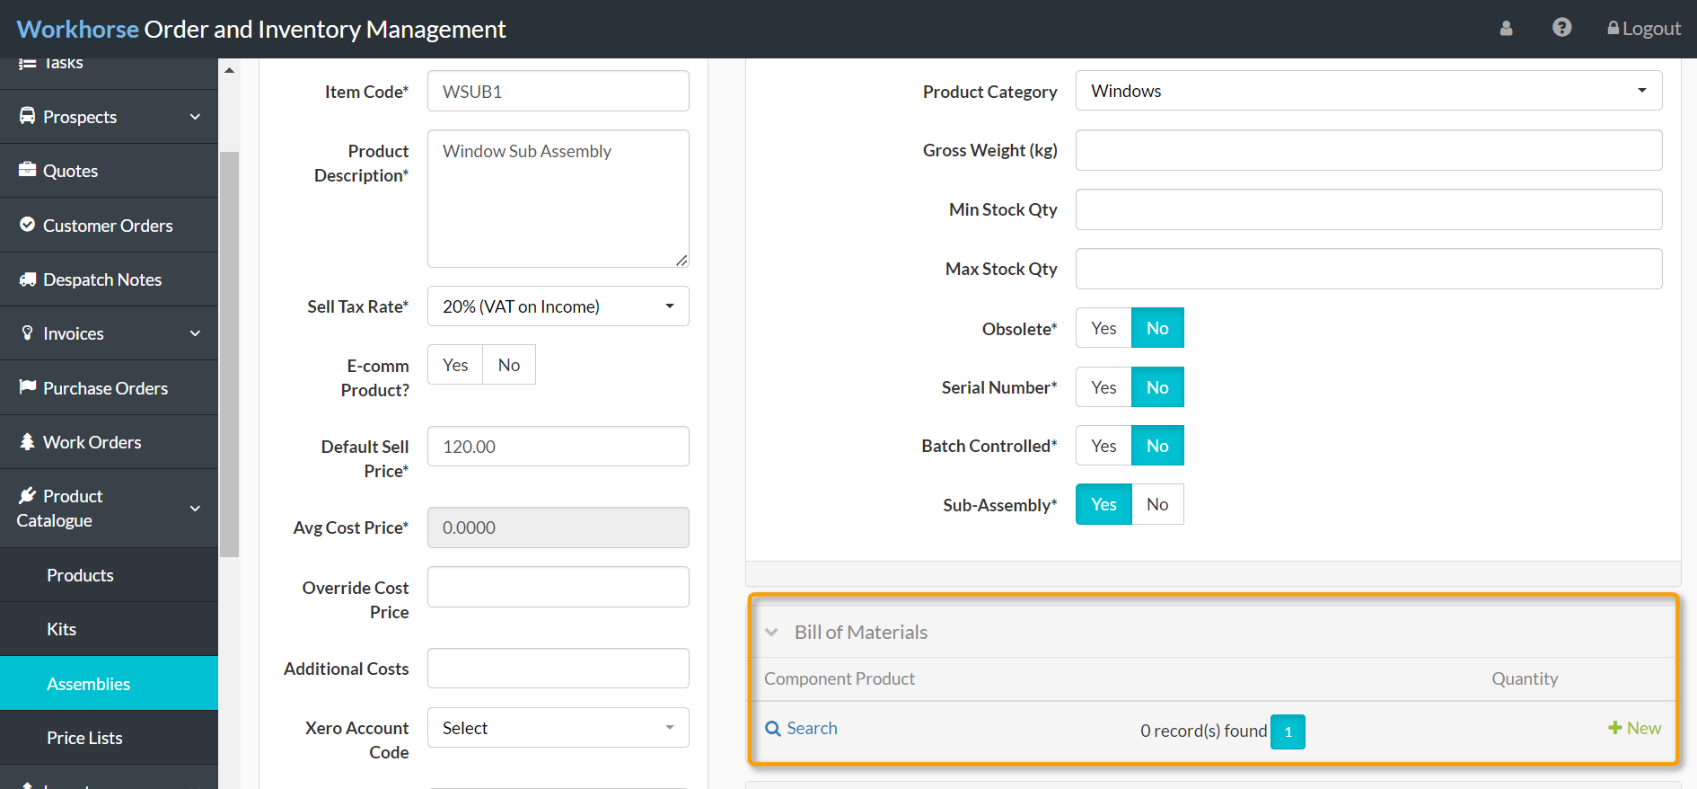
Component Products must first be added in Products before they can be added to an Assembly.
1. Expand the Bill of Materials section and click + New.

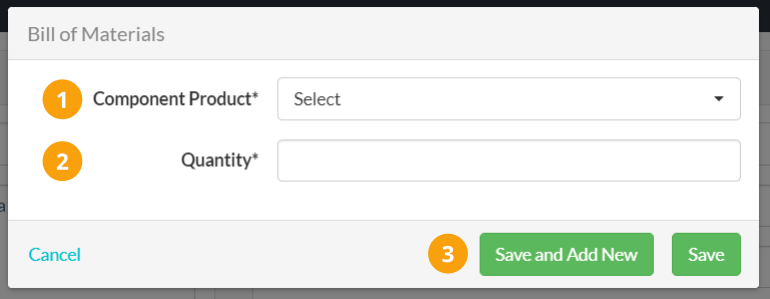
2. The Bill of Materials form will be displayed. Select/enter the details as required:

 |
Select a Component Product from the drop-down list. |
 |
Enter the Quantity of the selected Product that is required to create one Assembly. |
 |
Click Save or Save and Add New to add another Component Product to this Assembly. |
Add other information to an Assembly
Use the other sections of the Assemblies entry page to do the following:
- Assign the Assembly to a Product Category or add other information under Additional Information.
- Configure quantity-based pricing under Product Pricing.
- Record where the Assemblies are stored under Product Locations.
- Upload Files associated with the Assembly under Files.
Assembly field explanations
| Field | Mandatory? | Description |
| Item Code | Y | Enter the SKU to allow you to identify each Assembly uniquely. |
| Product Description | Y | Enter a description of the Assembly. This will appear on printable documents such as Quotes. |
| Sell Tax Rate | Y | Select the Tax Rate that applies to this Assembly from the drop-down list. |
| E-comm Product? | N | If you have e-commerce integration set up, select Yes to list the Assembly on your e-commerce store. |
| Default Sell Price | Y | Enter the retail price if no other prices or discounts are applied. |
| Avg Cost Price | Automatic | The average cost of this Assembly based on the cost of the Component Products (see Avg Cost Calculation). |
| Override Cost Price | N | Use this field to override the average cost price calculated by the system. |
| Additional Costs | N | Use this field to record additional costs above the actual cost price. |
| Xero Account Code | N | Select the nominal code in Xero for expenses from the drop-down list. |
| Xero Purchase Account Code | N | Select the nominal code in Xero for purchases from the drop-down list. |
| Unit of Measure | Y | Select the unit of measure the Assembly is sold in from the drop-down list. |
| In Stock | Automatic | The quantity of Assemblies in stock |
| Allocated | Automatic | The quantity currently allocated to Customer Orders. |
| Free Stock | Automatic | In Stock minus Allocated. |
| Back Order | Automatic | The quantity ordered on Customer Orders that cannot be fulfilled due to insufficient stock. |
| In Production | Automatic | The quantity currently on open Work Orders. |
| Xero Ref | Automatic | If you have a Xero integration, the reference number will be auto-filled once the Assembly is saved and added to Xero. |
Did you find what you’re looking for?
Here are some related topics you might find helpful:
