Suppliers
Suppliers are the companies your business buys Products from. Use the Suppliers Module to manage your Suppliers, their contact details, and more.

 |
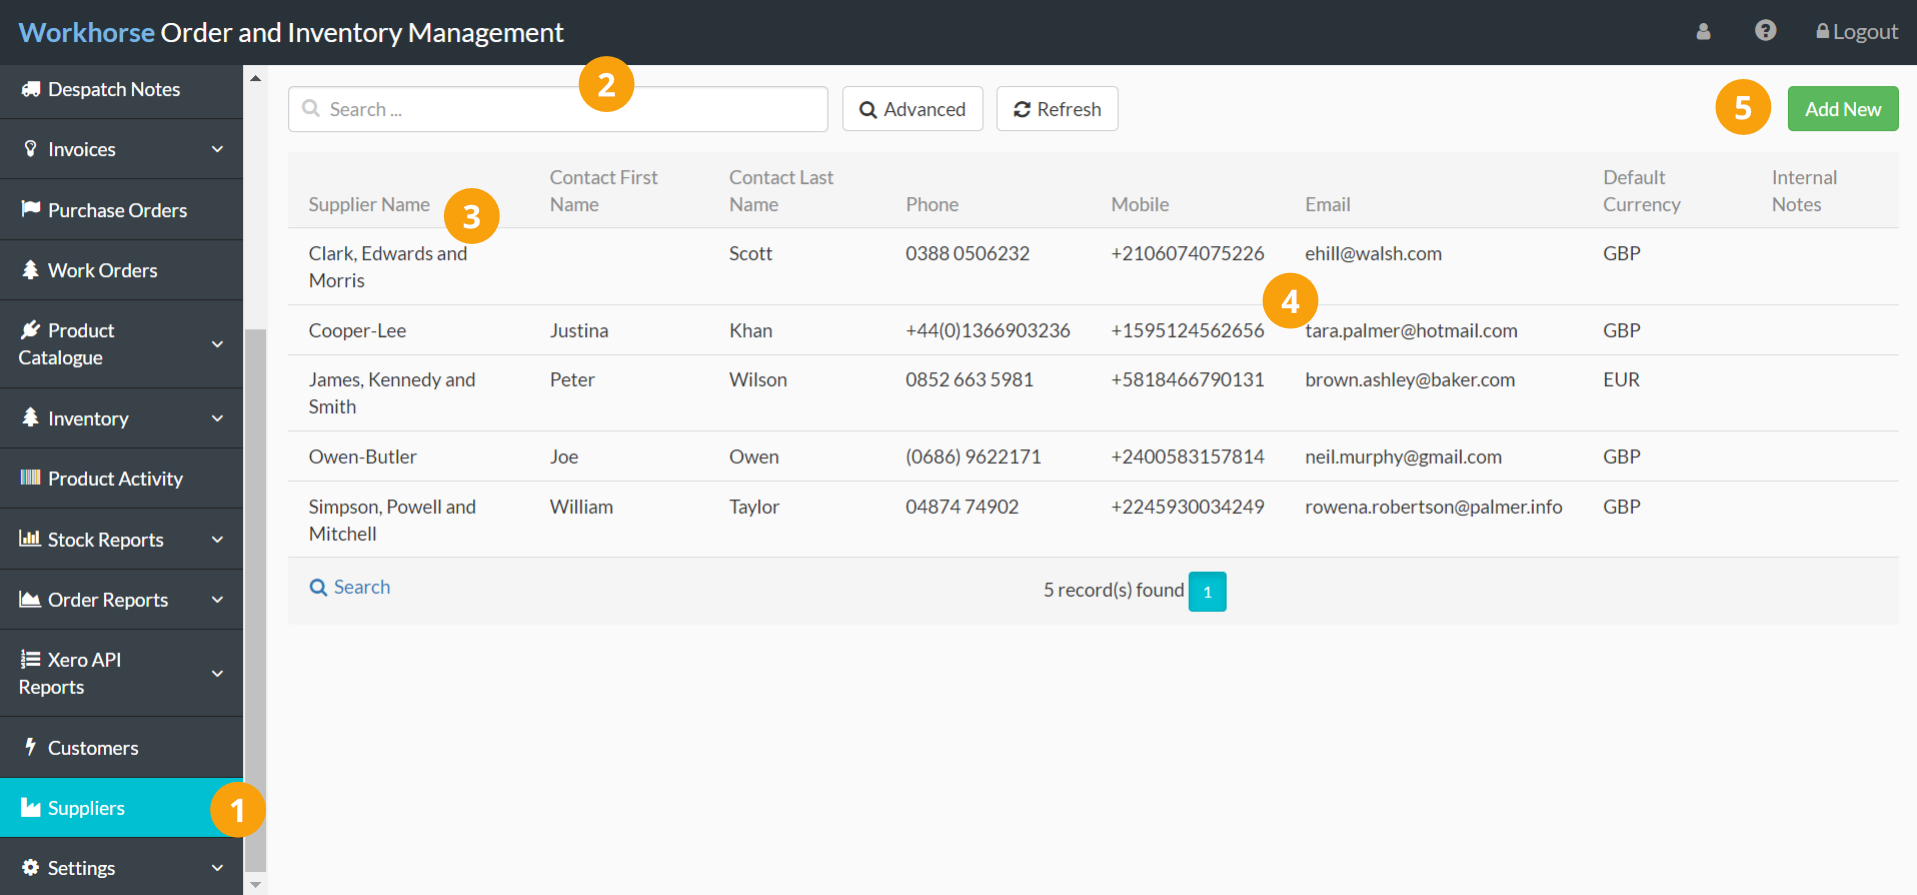
Navigate to Suppliers. |
 |
Use the Quick and Advanced Search to help you find the Supplier you’re looking for. |
 |
By default, Suppliers are ordered by Supplier Name (A-Z). To sort by something else, click on the column heading. Click again to reverse the sort order. |
 |
The contact details and Internal Notes columns help you to find important information at a glance. |
 |
Click Add New to add a new Supplier. |
Note:
The Suppliers Module is customisable so you can see the information that is most important to you and your workflow.
Add a new Supplier
Note:
To create a new Supplier, you will need to have appropriate User Access to the Suppliers Module.
1. Go to Suppliers.
2. Click Add New in the top-right corner.

Tip:
Alternatively, you can add a Supplier from a new Product, Note/Task or Purchase Order using the shortcut button.

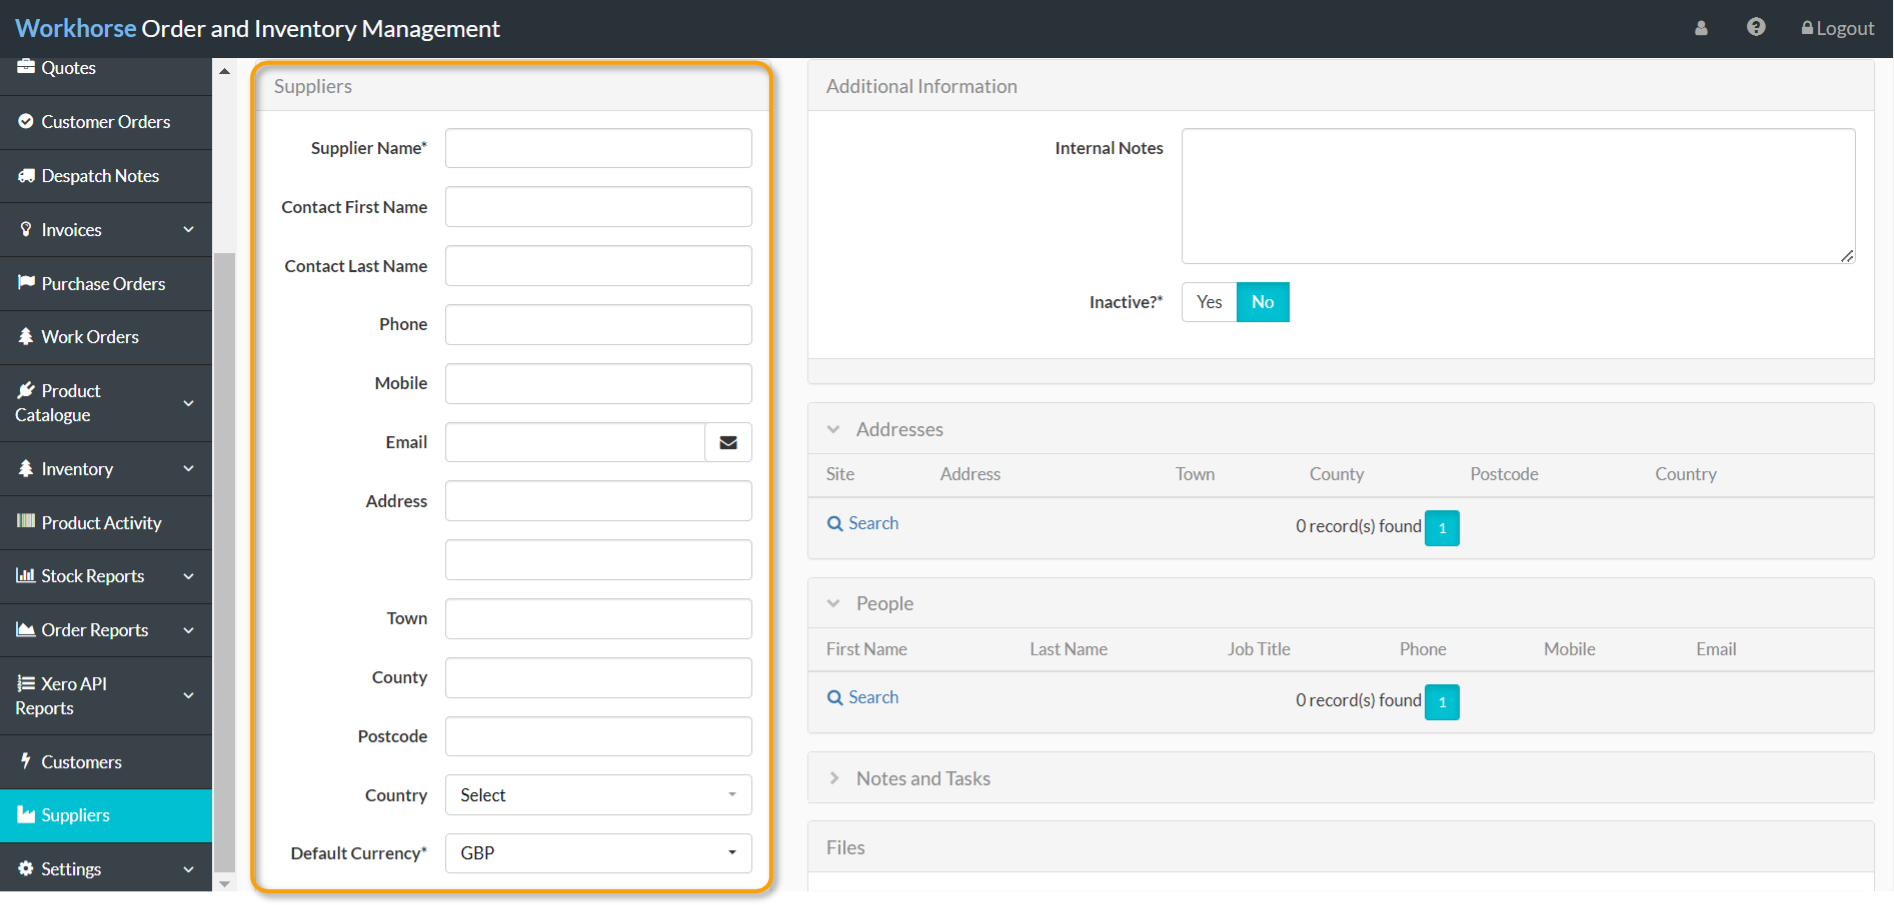
3. A new Supplier entry page will be displayed. Start by entering or selecting the details as required in the Suppliers section.
Note:
You will need to complete all of the mandatory fields (marked with a *) before you can save the Supplier.
Refer to Supplier field explanations for more information on each field.

4. Once all of the required details have been entered and selected in the Suppliers section, scroll down and click Save before adding any other information on the right-hand side.

Note:
Once you have created the Supplier, you will be able to add this Supplier to any Products you order from them. You will need to do this before you can issue a Purchase Order to this Supplier.
Add other information to a Supplier
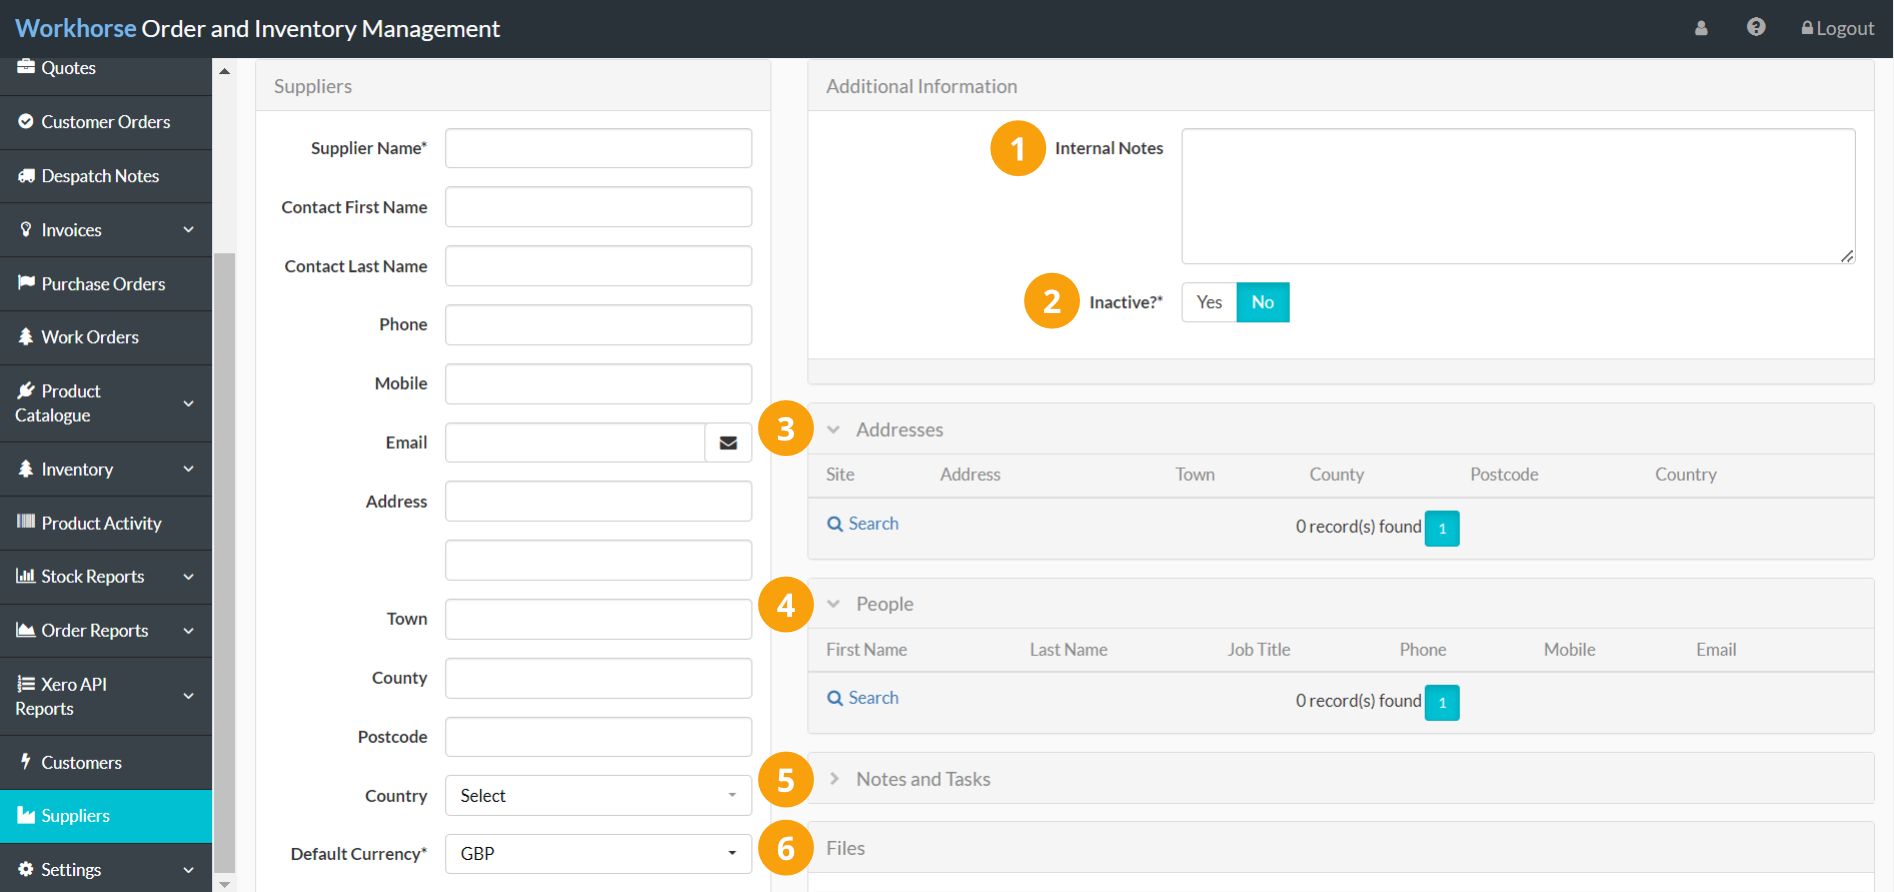
Use the other sections of the Supplier entry page to do the following:

 |
Add Internal Notes for reference. Notes entered here can be viewed from the Suppliers Module table view. |
 |
Configure if a Supplier is Inactive. Once marked as inactive, you won’t be able to create a Note/Task or Purchase Order for this Supplier. |
 |
Add any additional Addresses for this Supplier. |
 |
Add any additional contacts under People. |
 |
Add Notes and Tasks associated with this Supplier and assign them to yourself or a member of your team. |
 |
Upload Files associated with this Supplier under Files. |
Supplier field explanations
| Field | Mandatory? | Description |
| Supplier Name | Y | Enter the company’s registered name. This will appear on all Purchase Orders for this Supplier. |
| Contact First Name, Contact Last Name | N | Enter the details for your primary contact at this Supplier. Additional contacts can be entered in the Persons section on the right-hand side. |
| Phone, Mobile, Email | N | Enter the contact details for your primary contact at this Supplier. |
| Address, Town, County, Postcode, Country | N | Enter the main address for this Supplier. Additional addresses can be entered in the Addresses section on the right-hand side. |
| Default Currency | Y | Select the default currency for use on Purchase Orders for this Supplier. |
| Default Tax Rate | Y | Select the default Tax Rate from the drop-down list for use on Purchase Orders for this Supplier. |
| Xero Ref | Automatic | If you have a Xero integration, the reference number will be auto-filled once the Supplier is saved and added to Xero or when a Purchase Order for this Supplier is sent to Xero. |
Did you find what you’re looking for?
Here’s some related topics you might find helpful:
