Work Orders
Use the Work Orders Module to raise and manage Work Orders for Assemblies (Assemblies are Products made up of several Component Products that need assembling on site before despatch).
Note:
A Customer Order is not required to create a Work Order. Work Orders can be used to add Assemblies to stock, ready for despatch.
 |
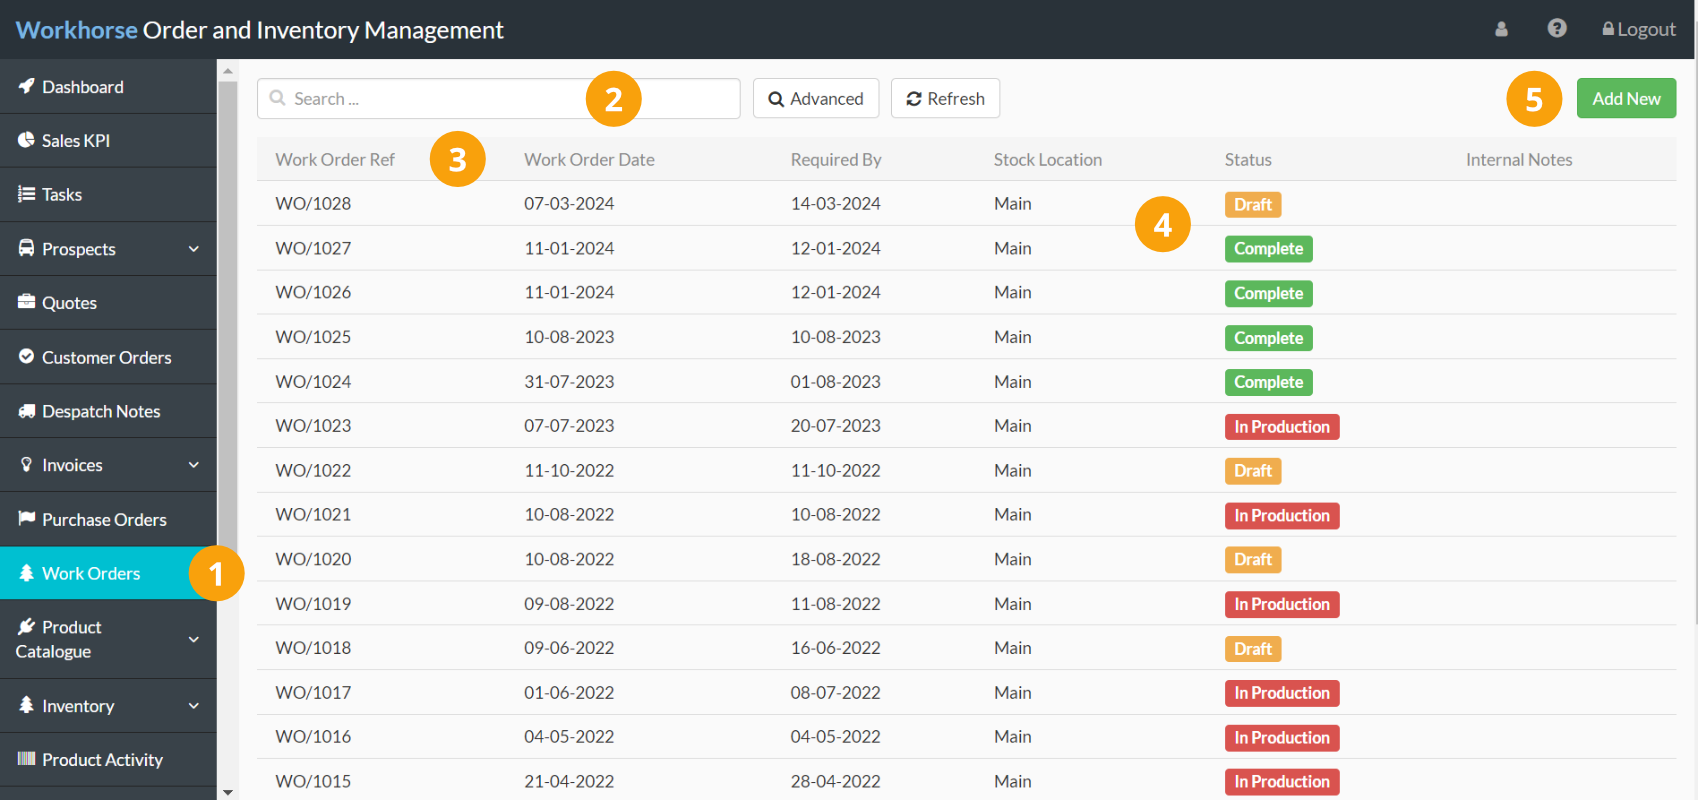
Navigate to Work Orders. |
 |
Use the Quick and Advanced Search to help you find the Work Order you’re looking for. |
 |
By default, Work Orders are ordered by Work Order Ref. To sort by something else, click on the column heading. Click again to reverse the sort order. |
 |
The Work Order Date, Required By, Stock Location, Status, and Internal Notes columns help you to keep track of your Work Orders at a glance. |
 |
Click Add New to add a new Work Order. |
Add a new Work Order
Note:
To create a new Work Order, you will need to have appropriate User Access to the Work Orders Module.
1. Go to Work Orders.
2. Click Add New in the top-right corner.

3. A new Work Order entry page will be displayed. Start by entering or selecting the details as required in the Work Orders section.
Note:
You will need to complete all of the mandatory fields (marked with a *) before you can save the Work Order.
Refer to Work Order field explanations for more information on each field.
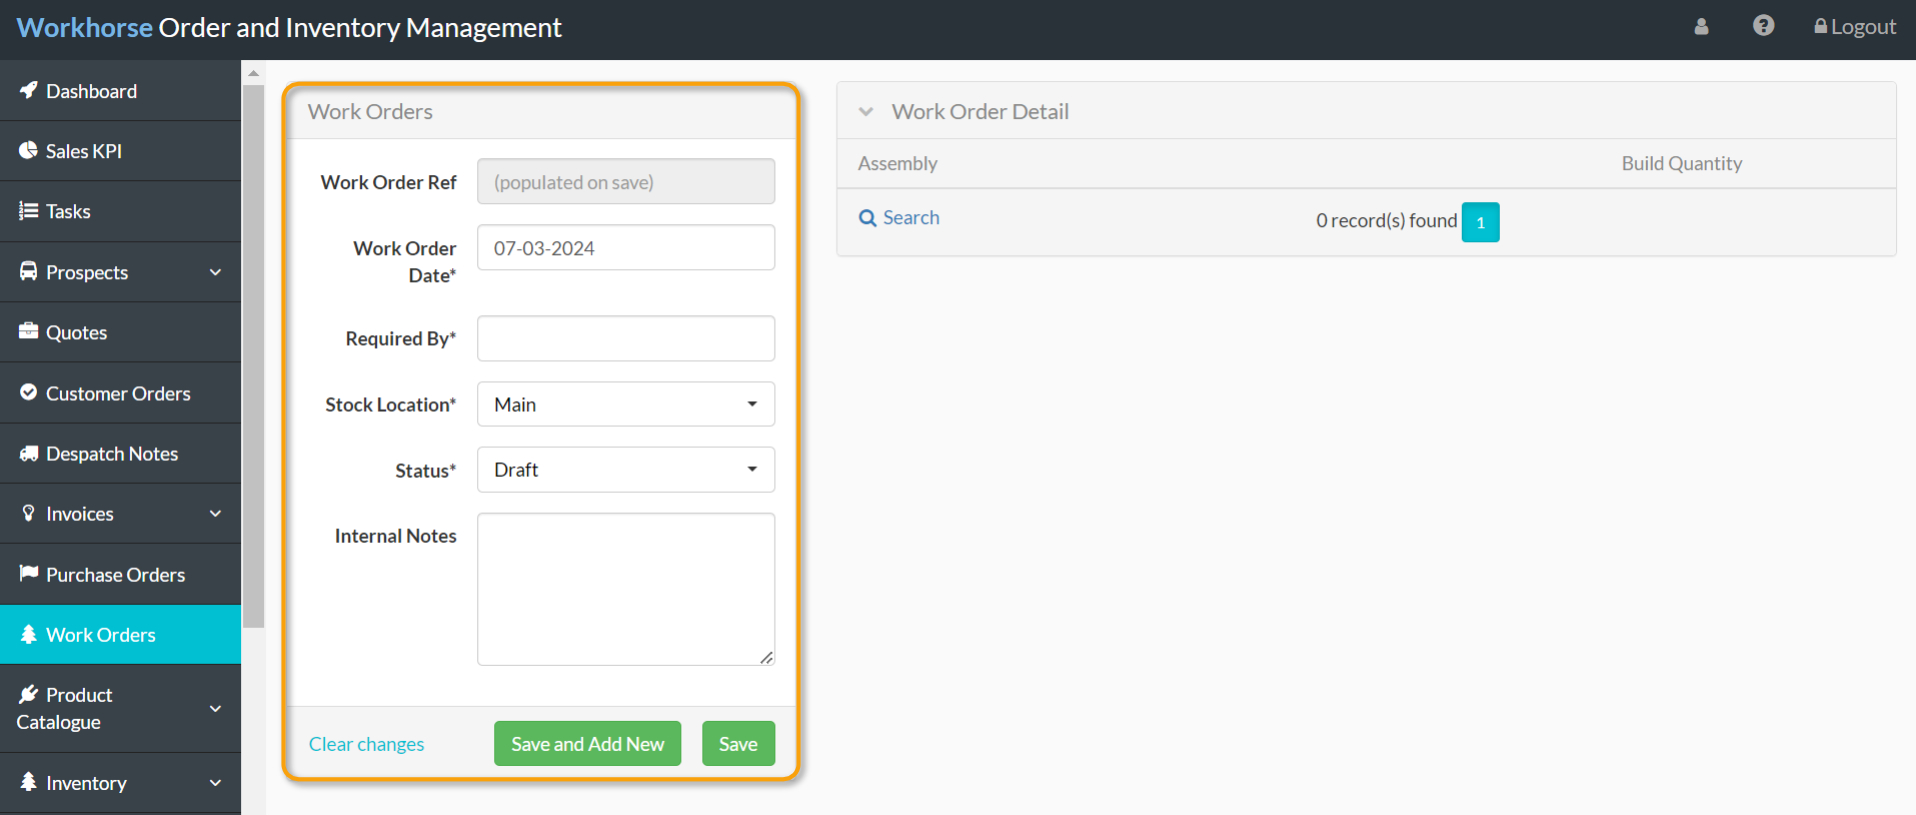
4. Once all of the required details have been entered in the Work Orders section, click Save.
Work Order Detail
Once the Work Order has been created, Assemblies will need to be linked.
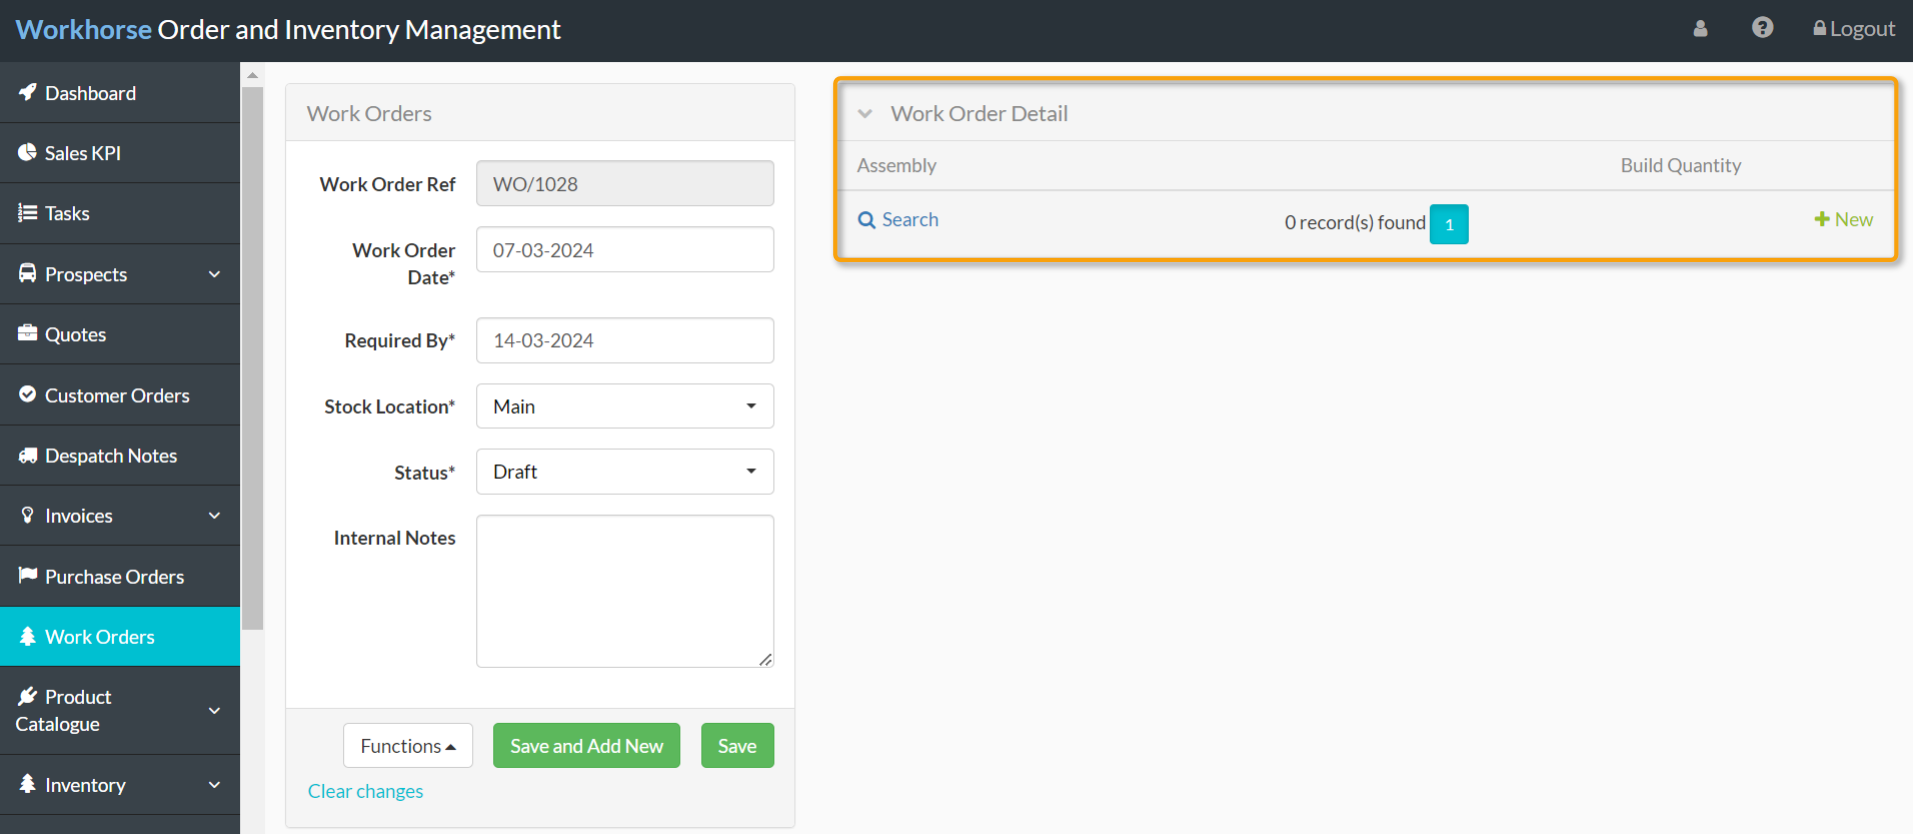
1. Under the Work Order Detail section, click + New.
2. The Work Order Detail form will be displayed. Select the Assembly from the drop-down list of Assemblies and enter the Build Quantity (the quantity that will be assembled).
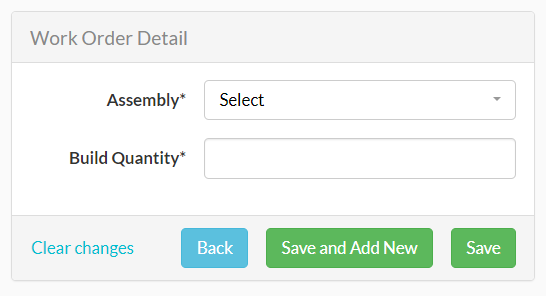
3. Click Save or Save and Add New to add another Assembly to this Work Order.
4. The Work Order Detail Items section on the right-hand side will auto-populate with the list of Component Products that will be needed for the production of the Assembly.
Note:
The quantity displayed for each Component Product in the Work Order Detail Items section is calculated by multiplying the quantity of each Component Product needed to create one Assembly by the Build Quantity (the number of Assemblies) added to the Work Order.
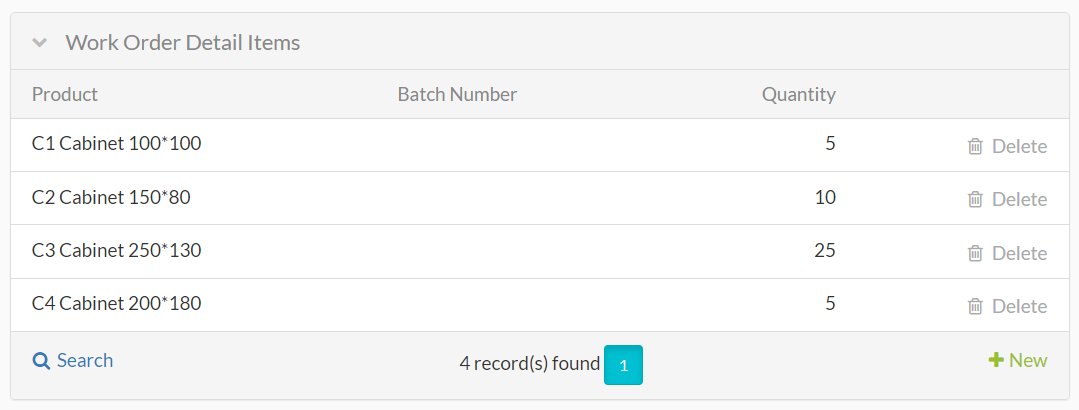
5. If any of the Component Products are serial number-controlled or batch-controlled, click on the Product/Assembly and select the Serial Number(s) or Batch Number(s) being used on this Work Order from the drop-down menu.
Update the status of a Work Order
Note:
If you see an error relating to serial numbers or batch numbers when changing the Status to Complete, check the following:
1. Click on the Assembly under Work Order Detail.
2. For batch-controlled Assemblies, ensure a Batch Number is entered.
3. Ensure the Serial Number(s) or Batch Number(s) have been selected for all serial number-controlled or batch-controlled Component Products.

Work Orders field explanations
| Field | Mandatory? | Description |
| Work Order Ref | Automatic | A system generated number which defaults when you save the Work Order. |
| Work Order Date | Y | The Date of this Work Order. Defaults to today’s date but can be changed. |
| Required By | Y | The date by which the Work Order is required to be complete. Picked from a Date Picker. |
| Stock Location | Y | Defaults to the Main Stock Location but can be changed by selecting another Location from the drop-down list. |
| Status | Y | The status of this Work Order. This defaults to Draft but can be changed to In Production, Complete or Cancelled. |
| Internal Notes | N | Any notes pertaining to this Work Order. |
Did you find what you’re looking for?
Here are some related topics you might find helpful:
