Customer Orders
Use the Customer Orders Module to generate new Customer Orders and send Order Confirmations to your Customers. You can also track the status of existing Customer Orders.
Note:
Only current Customer Orders will be displayed in the table view. To view Customer Orders that have been Completed or Cancelled, use the Advanced Search.

 |
Navigate to Customer Orders. |
 |
Use the Quick and Advanced Search to help you find the Customer Order you’re looking for. |
 |
By default, the most recent Customer Orders are displayed at the top of the page. To sort by something else, click on the column heading. Click again to reverse the sort order. |
 |
The Order Status column helps you to keep track of each Customer Order at a glance. |
 |
Click Add New to add a new Customer Order. |
Note:
The Customer Order Module is customisable so you can see the information that is most important to you and your workflow.
Add a new Customer Order
Note:
To create a new Customer Order, you will need to have appropriate User Access to the Customer Orders Module.
1. Go to Customer Orders.
2. Click Add New in the top-right corner.

Tip:
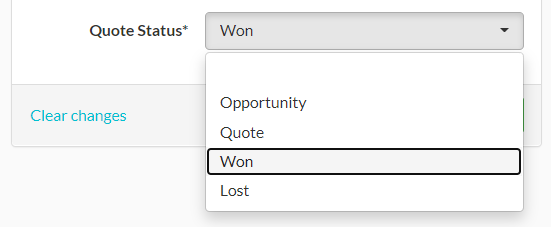
You can also create a Customer Order from an existing Opportunity or Quote by changing the Quote Status to Won.
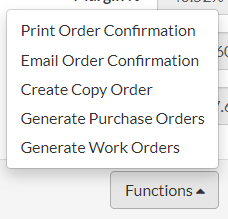
You can also create a copy of a previous Customer Order by opening the previous Customer Order, scrolling to the bottom of the page and selecting Functions > Create Copy Order. This creates a new Customer Order where you can edit the details as follows.
3. A new Customer Orders entry page will be displayed. Start by entering or selecting the details as required in the Customer Orders section.
Note:
You will need to complete all of the mandatory fields (marked with a *) before you can save the Customer Order. If you have created this Customer Order from an Opportunity or a Quote, some of the fields will be auto-filled.
Refer to Customer Orders field explanations for more information on each field.

4. Once all of the required details have been entered and selected in the Customer Orders section, scroll down and click Save before adding any other information on the right-hand side.

Add other information to a Customer Order
Use the other sections of the Customer Orders entry page to do the following:

|
Add Document Comments to add comments to your printed Order Confirmation. |
|
Add Internal Notes for reference. |
|
Add the Products your Customer has ordered under Order Detail. |
|
Click + New under Invoices to generate Invoices for this Customer Order. |
|
Click + New under Despatch Notes to generate Despatch Notes for this Customer Order. |
 |
Add Notes and Tasks associated with this Customer Order and assign them to yourself or a member of your team. |
 |
Upload Files associated with this Customer Order. |
Update the status of a Customer Order
The Order Status field helps to keep track of the Customer Order and can be viewed from the Customer Orders Module table view. This field is updated automatically based on Despatch Notes and Invoices associated with this Customer Order, except for when the Order needs to be marked as Cancelled.

| New | The Customer Order has been generated, but has not been despatched or invoiced. |
| Part Despatched | Part of the Order been despatched and the Order has not been invoiced. |
| Part Invoiced | None of the Order has been despatched but the Order has been partially invoiced. |
| Despatched | All of the Order has been despatched but the Order has not been invoiced. |
| Invoiced | None of the Order has been despatched but the Order has been fully invoiced. |
| Part Despatched / Part Invoiced | Part of the Order has been despatched and the Order has been partially invoiced. |
| Part Despatched / Invoiced | Part of the Order has been despatched and the Order has been fully invoiced. |
| Despatched / Part Invoiced | All of the Order has been despatched and the Order has been partially invoiced. |
| Part Complete (Cancelled) | Select to cancel the balance of a partially despatched Order. Once the corresponding Invoice has been generated, the Order will no longer appear in the Customer Orders Module table view, but can be found using the Advanced Search. |
| Complete | All of the Order has been despatched and the Order has been fully invoiced. |
| Cancelled | Select to cancel an Order that has not been despatched. The Order will no longer appear in the Customer Orders Module table view, but can be found using the Advanced Search. |
Print or email Order Confirmation
At the bottom of a Customer Order, click the Functions button to Print or Email an Order Confirmation.
Selecting Print Order Confirmation will open a PDF of the Order Confirmation which you can save or print.
Selecting Email Order Confirmation will open the Send Email form. The Title, Body, and Reply To fields will be auto-populated based on your Order Acknowledgement Email Template. The To field will be auto-populated with the Email saved on the Customer record. You can edit any of those fields or add files before clicking Send. This email will be sent directly from your Workhorse system.

Customer Order field explanations
| Field | Mandatory? | Description |
| Order Ref | Automatic | A sequential Order number will be assigned when you save this Customer Order. |
| Customer | Y | Select the Customer from the drop-down list. If the Customer isn’t already in your system, use the button on the right-hand side to add a new Customer. |
| Customer Address | Automatic | Auto-fills the main Address found on the Customer record. |
| Override Delivery Address | N | Select an alternative Delivery Address from the drop-down list if required. The Addresses can be configured in the Addresses section of the Customer record. |
| Order Date | Y | Defaults to today’s date. Click to select another date. |
| Order Source | N | To be able to monitor the sources of your Customer Orders, select the source from the drop-down list (configurable in Lists). |
| Order Status | Y | Defaults based on Despatch Notes and Invoices associated with this Customer Order. Use this field to cancel an Order if required. Refer to update the status of a Customer Order. |
| Ecomm Order | N | If you have an e-commerce integration set up, defaults to Yes if the order is received from your e-commerce store. If entering an order manually, select No. |
| Required By Date | N | Select the date the Customer requires the Order to be delivered by. |
| Despatch Stock Location | Y | Defaults to Main. Click to select another Stock Location this Order should be despatched from using the drop-down list. |
| Customer Ref | N | If the Customer has provided you with their reference (e.g., a Purchase Order or Project number), enter it here to include it on your printed Order Confirmation. |
| Discount % | N | Auto-fills based on the Customer Discount set on the Customer record. To apply a different discount across all Products on this Order, enter a percentage between 0.01-100%. To configure discounts for individual Products, use the Order Detail section on the right-hand side. |
| Tax Rate | Y | Auto-fills based on the Tax Rate selected on the Customer record. Click to select another Tax Rate for the Products on this Order only. |
| Price List | N | Auto-fills if a Price List has been selected on the Customer record. Click to select another Price List for this Order only. To configure pricing for individual Products, use the Order Detail section on the right-hand side. |
| Currency | Automatic | Auto-fills based on the Currency selected on the Customer record. |
| Total Cost Price | Automatic | Auto-fills based on the total cost price of the Products entered in the Order Detail section on the right-hand side. |
| Total Sell Price | Automatic | Auto-fills based on the total sell price of the Products entered in the Order Detail section on the right-hand side. |
| Margin % | Automatic | Auto-fills based on the percentage difference between the Total Cost Price and Total Sell Price. |
| Total Tax | Automatic | Auto-fills the total tax for this Order based on the Total Sell Price at the Tax Rate selected above. |
| Total Order Value | Automatic | Auto-fills based on Total Sell Price + Total Tax. |
Did you find what you’re looking for?
Here are some related topics you might find helpful: